

The repeatable field set feature in Ninja Forms allows you to create forms with a set of fields that can be repeated to collect multiple sets of data. This tutorial will guide you through the process of using the repeatable field set in Ninja Forms, enabling you to efficiently gather data that require multiple entries. By following these steps, you can easily create forms that accommodate various scenarios, such as user registrations, product orders, or event sign-ups.
You can also watch the video tutorial:
Having said that, let’s move on to the steps on How To Use a Repeatable Fieldset In Ninja Forms.
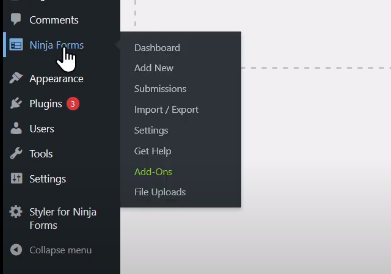
Step 1: Access Ninja Forms
- Hover over the Ninja Forms option in your WordPress dashboard and click on “Add New” to create a new form.
- Choose a form template from the available options or create a custom form by adding fields manually.
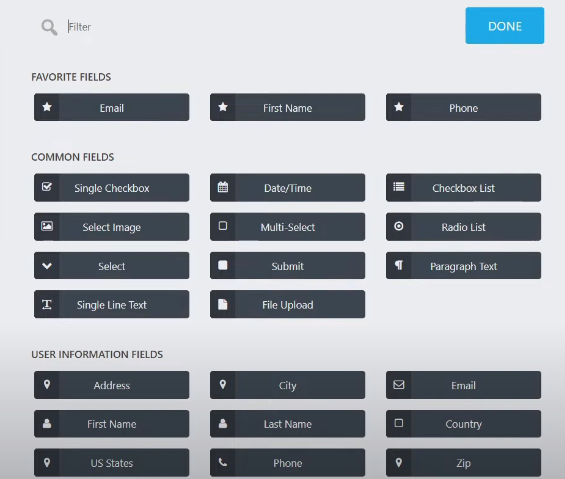
Step 2: Add Fields
- Drag and drop the desired fields onto the form builder area to add them to your form.
- Additionally, include a submit button to allow users to submit the form once they have entered their data.
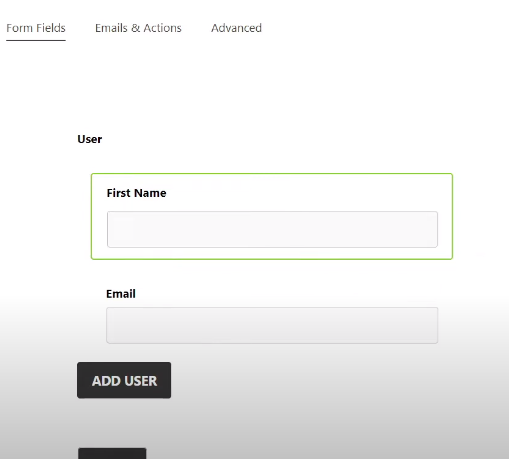
Step 3: Configure the Repeatable Field Set
- Click on the repeatable field set in the form builder to access its field options.
- Customize the label of the field set according to your preference.

Step 4: Add Fields to the Repeatable Field Set
- Within the repeatable field set, drag and drop the fields you want to include.
- Edit the labels of these fields to provide clear instructions or indicate the type of data required.
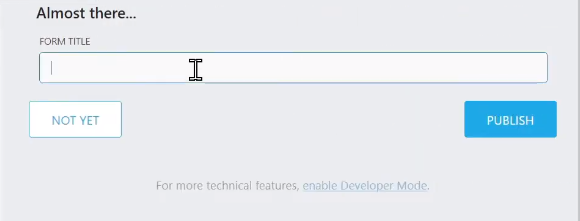
Step 5: Publish the Form
- Click on the “Publish” button to save your form.
Step 6: Preview the Form
- Use the preview option to see how the form appears to users.
- Make any necessary adjustments to the form’s layout or field settings if needed.
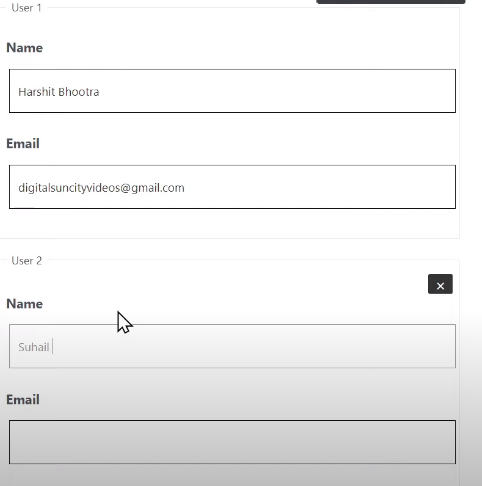
Step 7: Test the Repeatable Field Set
- Fill in the form with test data to see how the repeatable field set works.
- Click on the “Add User” button (or the custom label you assigned) to repeat the fieldset and collect multiple sets of data.
- Submit the form to save the entries.
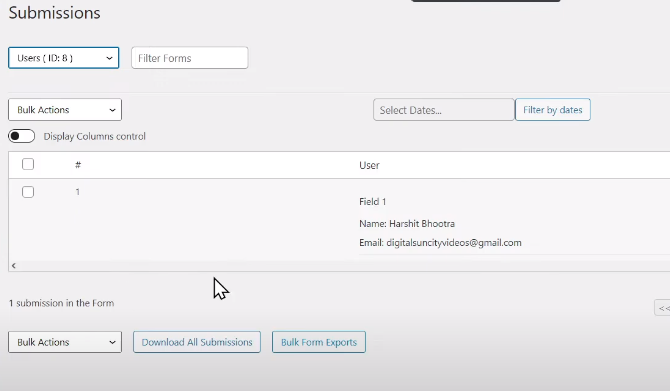
Step 8: View Form Entries
- To access the submitted form entries, hover over Ninja Forms in the WordPress dashboard and click on “Submissions.”
- Select the specific form from the list to view its entries.
- The form entries will display all the details provided by users, including the repeated fieldsets.
Conclusion: By following the steps outlined in this tutorial, you can easily create a form with a repeatable field set using Ninja Forms. This powerful feature enables you to collect multiple sets of data within a single form, improving efficiency and user experience. Whether you need to gather user information, process product orders, or manage event registrations, the repeatable field set feature provides a flexible solution. Accessing and reviewing the submitted form entries in the Submissions section of Ninja Forms allows you to analyze the data effectively. We hope this guide helps you utilize the repeatable field set feature efficiently in your Ninja Forms. If you have any further questions or need assistance, feel free to reach out to our support team. Thank you for your interest in Ninja Forms and your commitment to enhancing your form-building capabilities.

0 Comments