

Page breaks in WP Forms allow you to break a long form into multiple pages, enhancing user experience and organization. By dividing the form into manageable sections, you can simplify the form-filling process for users. In this tutorial, we will guide you through the steps to use and set up page breaks in WP Forms using WP Forms Pro.
You can also watch the video tutorial:
Having said that, let’s move on to the steps on How To Set Up & Add Page Breaks In WPForms.
Step 1: Create or Edit a Form
- Access your WordPress dashboard and navigate to the WP Forms section.
- Click on “Add New” to create a new form or select an existing form you want to edit.
- Customize the form fields according to your requirements.

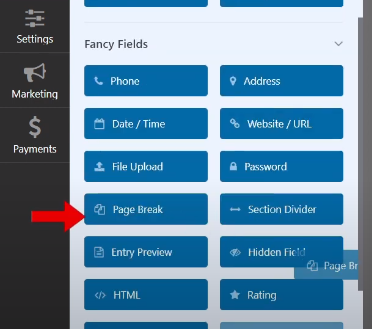
Step 2: Add Page Breaks
- In the form builder area, locate the “Page Break” field.
- Drag and drop the “Page Break” field into the desired position in the form builder.
- Repeat the process if you need to add more page breaks at different points in the form.
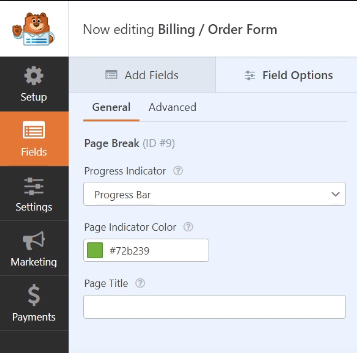
Step 3: Customize Page Break Options
- Click on the “First Page / Progress Indicator” section located at the top of the form builder.
- Access the additional options for your multi-page form.
- Choose a progress indicator to display the user’s progress through the form. Options include a progress bar, a numbered list, or no indicator if preferred.
- Customize the color of the page indicator to match your form’s design.
Step 4: Save and Preview the Form
- After adding page breaks and customizing the options, click on the “Save” button to save your form.
- Preview the form to observe the page breaks in action.
- The form will be divided into multiple pages based on the placement of the page break fields.
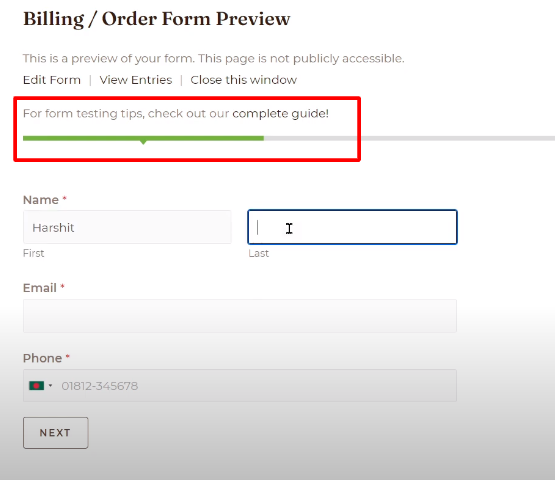
Step 5: Test the Form
- Fill in the form fields and click on the “Next” button to proceed to the next page.
- Continue filling out the form on each page until you reach the final page.
- Once you submit the form, you will see a success message or any other designated confirmation message.
Conclusion: By following these step-by-step instructions, you can effectively use and set up page breaks in WP Forms using WP Forms Pro. Dividing a long form into multiple pages enhances user experience, making it easier for users to navigate and complete the form. Remember to save your form after making any changes and thoroughly test it to ensure that the page breaks function as expected. We hope this tutorial helps you utilize and set up page breaks in your WP Forms.

0 Comments