

Introduction: Elementor is a powerful page editor that enables you to design and customize your WordPress website effortlessly. In this step-by-step tutorial, we will guide you through the process of selecting icons for buttons using Elementor. By incorporating icons, you can enhance the visual appeal and functionality of your buttons, grabbing the attention of your visitors.
You can also watch the video tutorial:
Having said that, let’s move on to the steps on How to Select Icons for Buttons in Elementor.
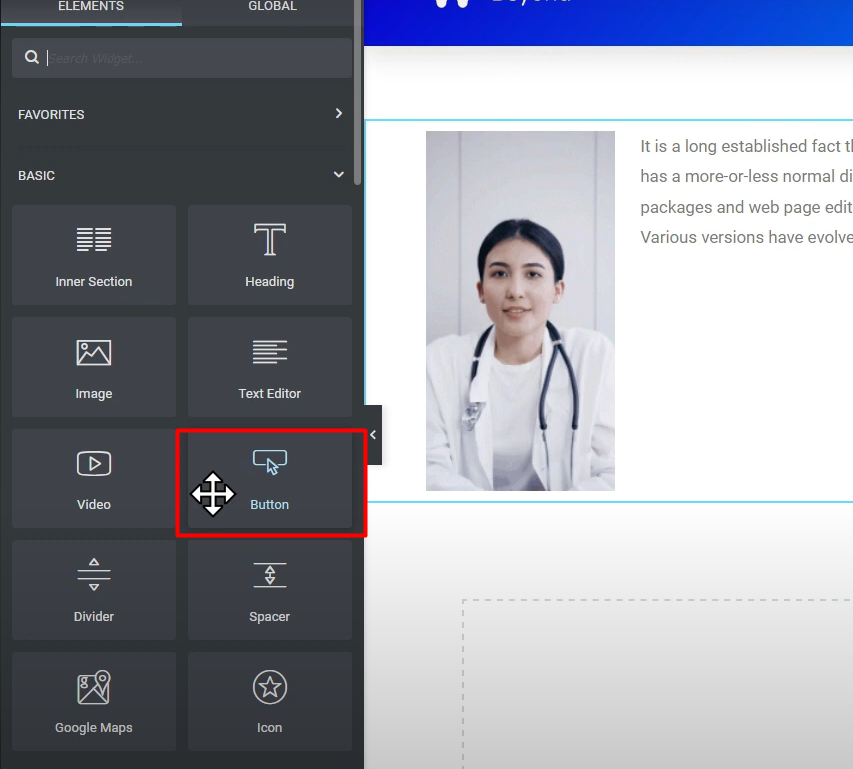
Step 1: Open Elementor Page Editor and Add a Button Element:
- Log in to your WordPress dashboard and navigate to the page where you want to add the button.
- Click on “Edit with Elementor” to open the Elementor page editor.
- Locate the section where you wish to place the button and drag and drop the “Button” element onto the desired spot within the section.
Step 2: Modify Button Settings:
- With the button element selected, you will see the settings panel on the left side of the Elementor editor.
- Explore the various options in the settings panel to customize the button according to your requirements.
- You can modify the button type, such as primary, secondary, or custom, as well as configure additional options like size, alignment, and shape.
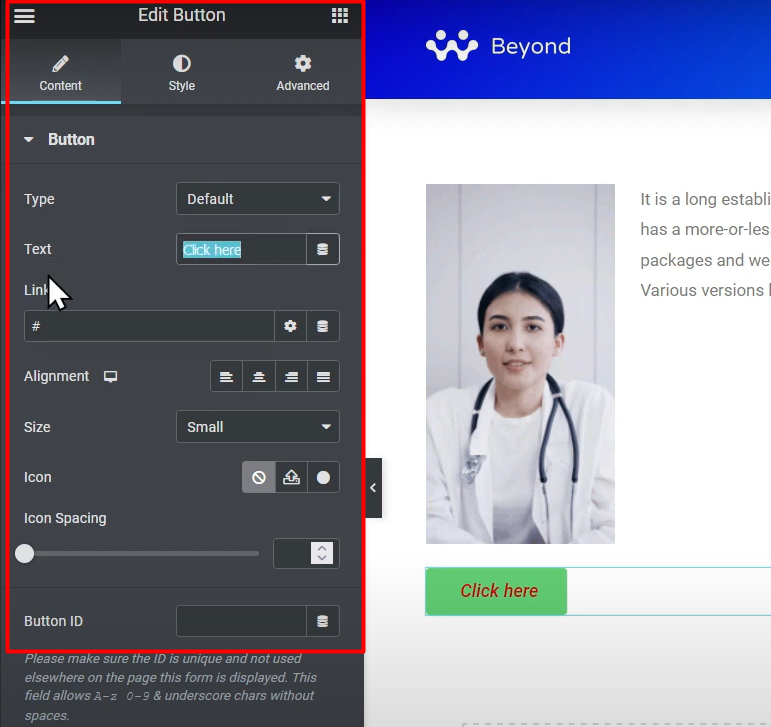
Step 3: Select an Icon for the Button:
- In the settings panel, find the option labeled “Icon Library” and click on it.
- This action will open the icon library, offering a wide range of icons for you to choose from.
- Browse through the library or use the search functionality to find an icon that suits your button’s purpose.
- Once you find the desired icon, simply click on it to select it.
Step 4: Customize Button Appearance:
- After selecting the icon, you can further customize the button’s appearance by navigating to the “Style” tab in the settings panel.
- In the “Style” tab, you can modify the button’s color, adjusting it to match your website’s design scheme.
- Additionally, you can fine-tune the typography settings to control the font style, size, and other relevant attributes.
Step 5: Save and Preview:
- Once you are satisfied with the icon selection and button styling, click on the “Update” button to save your changes.
- To see how the button looks with the selected icon on the front end of your website, click on the “Preview” button or visit the page in a new browser tab.
Conclusion: By following these simple steps, you can easily select icons for buttons in Elementor, adding visual appeal and enhancing the functionality of your website. Experiment with different icons and button styles to create a captivating and user-friendly experience for your visitors. Elementor provides a vast library of icons, allowing you to customize your buttons according to your branding and design preferences. Enjoy exploring the possibilities and make your buttons stand out!

0 Comments