

Forminator Forms is a powerful WordPress plugin that allows you to create and manage custom forms on your website. In this tutorial, we will learn how to make contact fields optional or required using the Forminator Forms plugin. Whether you want to allow users to skip certain fields or make them mandatory for submission, this guide will walk you through the process. Let’s get started!
You can also watch the video tutorial:
Having said that, let’s move on to the steps on How To Make the Contact Forms Field Optional Or Mandatory In WordPress.
Step 1: Install and Activate the Forminator Forms Plugin:
- Log in to your WordPress dashboard.
- Navigate to “Plugins” in the sidebar and click on “Add New”.
- In the search bar, type “Forminator Forms” and press Enter.
- Locate the “Forminator Forms” plugin and click on “Install Now”.
- Once the installation is complete, click on “Activate” to activate the plugin.
Step 2: Create a New Form:
- Hover over “Forminator” in the sidebar and click on “Forms”.
- Click on the “Create” button to create a new form.
- Select the desired form template or start with a blank form.
- Give your form a title and click on “Create”.

Step 3: Configure Field Settings:
- You will see the default form fields added to your form.
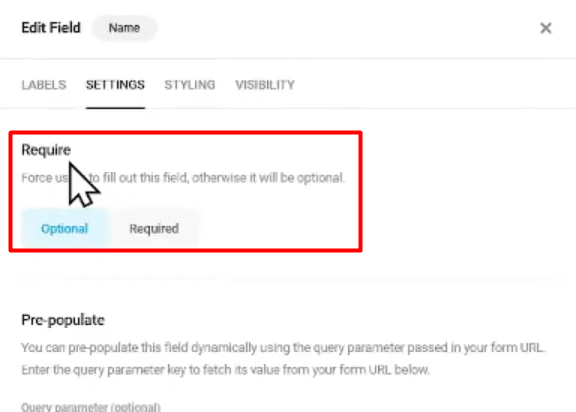
- To make a field optional or required, click on the settings icon next to the field and select “Edit Field”.
- In the field settings pop-up, you can modify the label name, description, and other field-related settings.
- Under the “Settings” tab, toggle the switch to make the field either optional or required.
- Click on “Apply” to save the changes.
- Repeat the process for other fields in the form to make them optional or required.

Step 4: Customize Additional Field Settings:
- In addition to making fields optional or required, you can further customize field settings.
- Modify label names, descriptions, default values, and other field-specific options based on your requirements.
- Explore other tabs in the field settings pop-up, such as “Validation” and “Styling”, to enhance the functionality and appearance of the fields.
- Click on “Apply” to save any changes made to the field settings.
Step 5: Preview and Test the Form:
- After configuring the field settings, click on the “Preview” button to see how the form looks.
- Test the form by filling in the fields and submitting a test entry to ensure the optional or required settings are working as intended.
Conclusion:
By following these step-by-step instructions, you have learned how to make contact fields optional or required using the Forminator Forms plugin. This flexibility allows you to tailor your forms to your specific needs, providing a seamless user experience while collecting the necessary information. Experiment with different field settings and explore the features offered by Forminator Forms to further enhance your form-building capabilities in WordPress.

0 Comments