

In this tutorial, we will demonstrate how to limit options for the date field in Contact Form 7, a popular WordPress plugin. By setting specific date ranges, you can control which dates users can select in the form. Let’s begin with the step-by-step instructions.
You can also watch the video tutorial:
Having said that, let’s move on to the steps on How To Limit Options For the Date Or Time Field In Contact Form 7 In WordPress
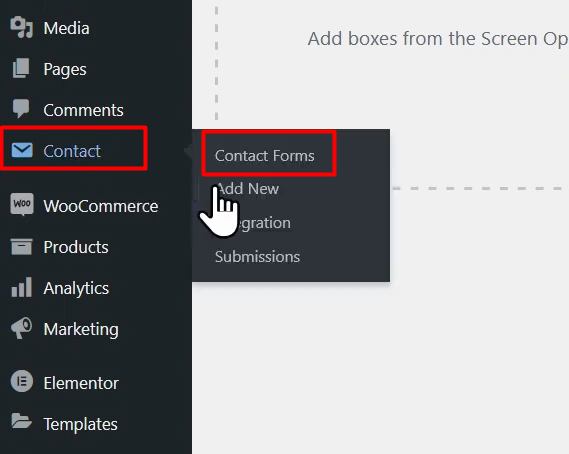
Step 1: Access the Contact Form 7 Form Builder:
- Log in to your WordPress dashboard.
- In the sidebar, navigate to “Contact” and click on “Add New” to access the Contact Form 7 form builder.
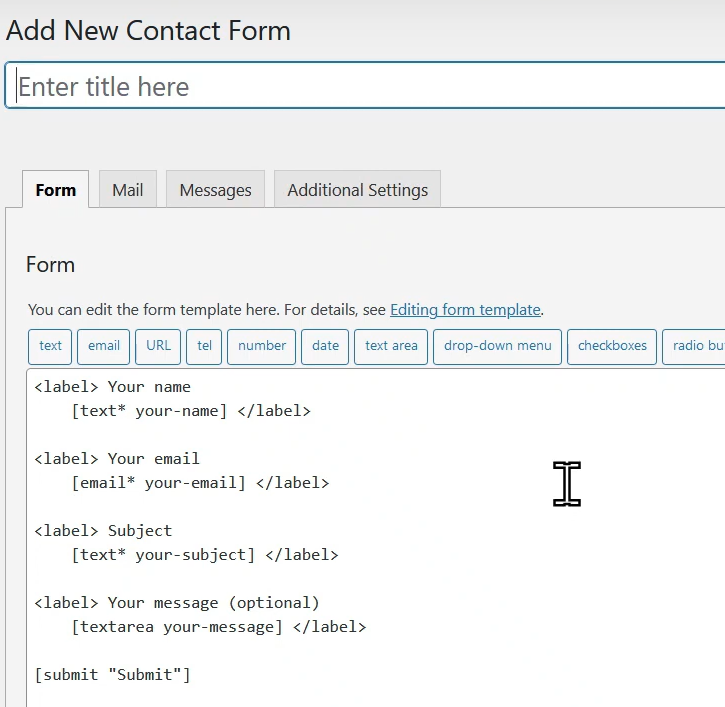
Step 2: Create a New Form and Customize Fields:
- Give your form a suitable title.
- Save the form to ensure your progress is saved.
- Remove any existing fields that you do not want in this form.
- Click on the “Date” tag to insert the date field into your form.
Step 3: Customize the Date Field:
- In the popup that appears, you can edit the label name for the date field.
- Set a specific range or limit options for date selection according to your requirements.
- Adjust the date range by specifying the minimum and maximum dates allowed.
- Customize the field label to provide clear instructions or indicate any limitations.

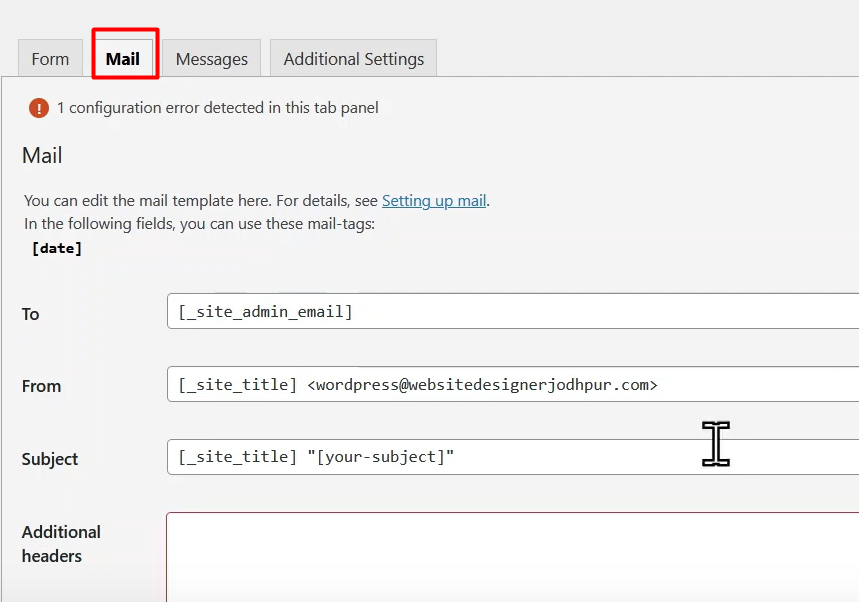
Step 4: Save and Configure Email Settings:
- Save the form after making the necessary changes.
- Under the “Mail” tab, you can remove any additional headers or modify the email message body as needed.
- Edit the message body to reflect the purpose or instructions related to the date field.
Step 5: Embed the Form:
- Copy the shortcode provided in the form builder.
- Navigate to “Pages” in the WordPress dashboard and click on “Add New”.
- Give your page a title and paste the shortcode into the editor.
- Publish the page to make the form live on your website.
Step 6: Test and Verify:
- Visit the page where you embedded the form.
- Verify that the date field displays the specified date range.
- Select a date within the allowed range to confirm that the limitation is working correctly.

Conclusion:
Congratulations! You have successfully limited the options for the date field in Contact Form 7 using the provided instructions. By following these steps, you can customize the date range for your form and ensure users can only select dates within the specified range. Contact Form 7 provides a user-friendly interface to create and manage forms in WordPress. Experiment with different field options and explore the plugin’s features to enhance your website’s contact forms and improve user interactions.

0 Comments