

WordPress is a powerhouse with a plethora of themes and plugins that allow you to create almost any type of website. WordPress can handle everything from e-commerce to a simple blog. However, while selecting a WordPress web hosting provider, you should priorities performance, security, and support.
WordPress has a tiny upload size limit that inhibits you from uploading huge files, plugins, and themes. Assume you’re developing a WordPress website to store a collection of massive picture files or a media hosting site with single media file sizes in the GBs.
In that case, you can run into a problem where you can’t upload media files larger than 25MB (in most cases). In a situation like this, you must greatly extend the upload size in WordPress or on your server (or just both of them).
You can watch the video tutorial below for this article:
The 500 Internal Server issue always seems to occur at the most inconvenient time; many people are left scratching their heads, attempting to figure out how to get a WordPress website live.
What Is WordPress’s Maximum Upload Size?
Large file uploads to a server consume a substantial proportion of the server’s resources. To prevent users from causing server timeouts, WordPress’s default upload size ranges from 2MB to 150MB. Normally, the hosting provider establishes this restriction at the server level only.
Even though WordPress does contain constants that can determine this limit, unfortunately in most situations, they cannot overrule the server-level settings.
You can just go to your WordPress site’s Media Library in case you wish to confirm this. Try submitting a file that is larger than the maximum upload file size restriction here. An error message stating that “the example photo name exceeds the maximum upload size for this site” may display.
Even though we all know that the “excessive upload size for this site” error is quite an irritating text to see, it exists for two reasons: security and efficiency. It makes it harder for site administrators and other users, particularly malicious actors, to upload huge files (e.g. high-resolution images, large videos).
Otherwise, it may cause your website’s server to become inoperable, causing your site to crawl to a halt. Moreover, it might entirely deactivate your website!
How Can I Check WordPress’s Current Maximum Upload Size?
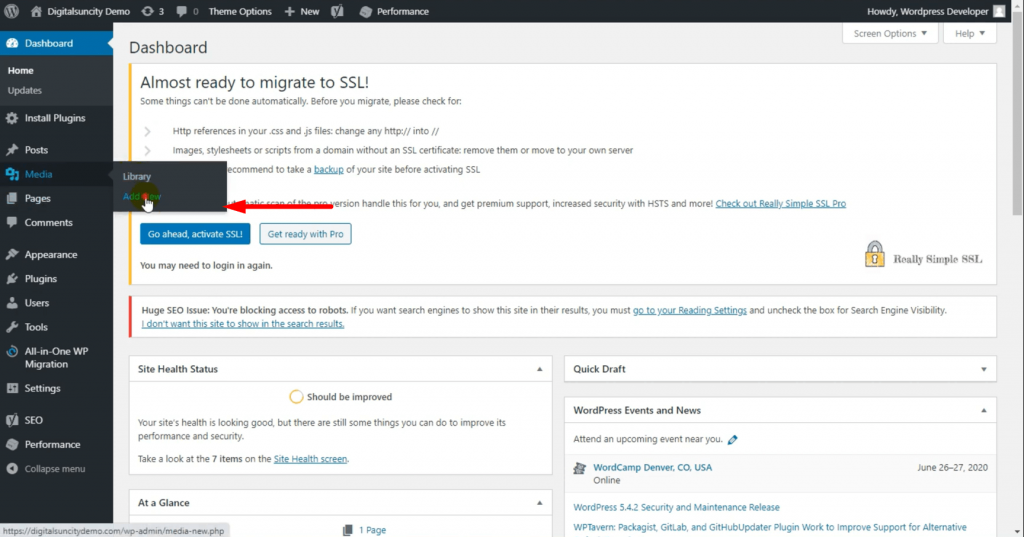
In the Library of Media
Navigate to Media > Library in your WordPress admin to find out what your site’s current maximum upload size is. Go to this page and click the Add New button to use the media uploader feature.

So, At Last, Why Must You Increase WordPress’s Maximum Upload File Size?
You may wish to raise the maximum upload file size on your WordPress site for a variety of reasons. Here are some of the most common:
- You wish to install a huge theme or plugin from the WordPress admin panel.
- Regularly updating your WordPress blog is an excellent method to keep your viewers interested and returning for more. This involves routinely posting new photographs, videos, audios, and other media. However, this isn’t always achievable if your uploads have a file size limit.
- You wish to use a huge video or image as the backdrop or top of your website.
- Or if you ever have a sudden wish to sell digital files directly from your website, such as eBooks, photos, movies, themes, and plugins. These files may sometimes be hundreds of gigabytes in size (or more).
Now, do you wish to boost the maximum file upload size within WordPress? File upload size limits may prohibit you from utilising a media uploader or installing plugins and themes at times. This post will demonstrate how to simply raise the maximum file upload size in WordPress to resolve such concerns.
Finally, let’s go ahead and move forward with the simple and straight forward steps to increase the maximum upload file size.
- Login to cPanel.
- Search for the PHP version.
- Click on Select PHP Version
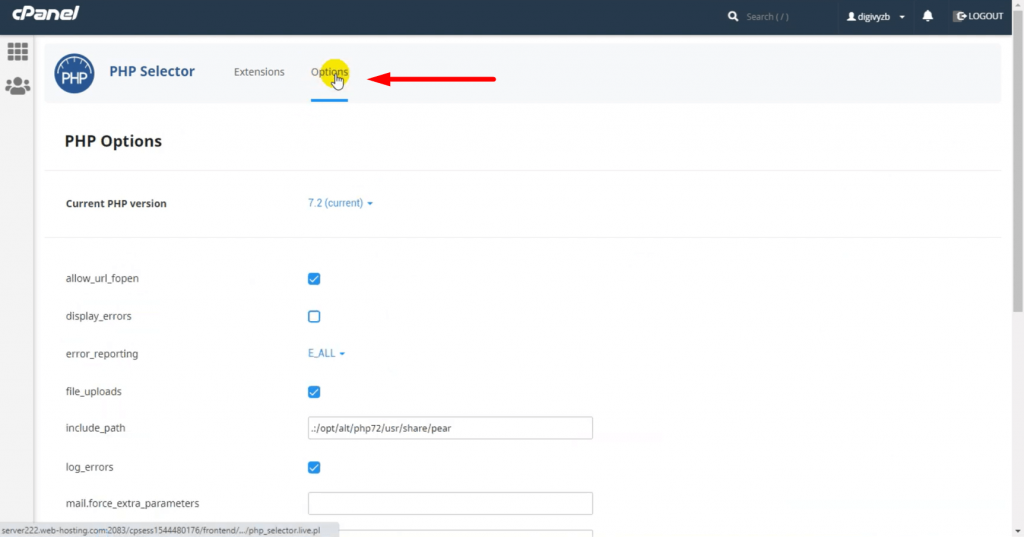
You’ll see various PHP extensions displayed on your screen.
- On the top, click on the Options Tab

Keep note that you have to make important changes on this particular page.
- Further, scroll down and search for Max Execution Time.
- Go ahead and set the memory time required by you.
- Scroll down and stop at the Memory Limit.
- You can set it to 1 GB if you wish to.
- Scroll to the bottom of the page and adjust the Upload Max File Size to suit your needs.

When it’s finished, you’ll get a notification that says ‘Successfully Saved’ in the upper right corner of your screen.
You may now navigate to your WordPress dashboard. Hover over media, click on Upload New media. You’ll see on the bottom that the maximum upload file size has been increased to 1GB.

0 Comments