

Editing the font in Elementor gives you the power to customize the typography and enhance the visual appearance of your text. Whether it’s a heading, paragraph, or any other text element, Elementor provides an intuitive interface to easily edit fonts and create visually appealing typography. In this step-by-step guide, we’ll walk you through the process of editing fonts in Elementor.
You can also watch the video tutorial:
Having said that, let’s move on to the steps on How To Edit Font In Elementor.
Step 1: Access the WordPress Dashboard
Start by accessing the WordPress dashboard of your website. Enter your login credentials and navigate to the dashboard.
Step 2: Select the Page or Post
Hover over the “Pages” tab in the dashboard menu and click on “All Pages” (or “All Posts” if you want to edit a post). This will display a list of all the pages or posts on your website. Locate the specific page or post where you want to edit the font and click on the “Edit with Elementor” link.

Step 3: Locate the Text Element
Once you are in the Elementor editor, find the text element that you want to edit. It could be a heading, paragraph, or any other text element on the page. Locate the element you wish to modify.

Step 4: Access the Editing Options
To edit the font of the selected text element, click on the pen icon that appears when you hover over the element. This will open the element’s editing options.
Step 5: Navigate to the Style Tab
Among the various tabs in the editing options, click on the “Style” tab. This tab contains controls to customize the appearance of the selected text element.
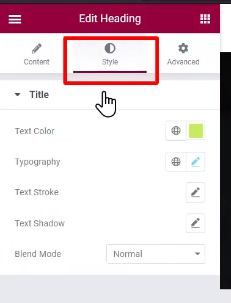
Step 6: Find the Typography Controls
Look for the “Typography” controls within the style settings. These controls allow you to edit the font of the text. Click on the typography controls to access the font editing options.
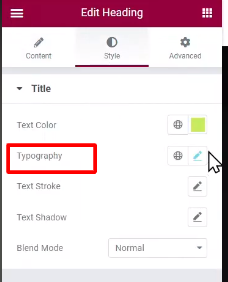
Step 7: Choose the Font
To change the font, click on the pen icon next to the font field. This will open the font selection panel. Browse through the available fonts or use the search bar to find a specific font that suits your design concept.

Step 8: Customize the Font Appearance
Once you have selected the font, you can further customize its appearance. Adjust the font weight, size, style, letter spacing, and more. Experiment with these options to achieve the desired typography and visual effect.

Step 9: Preview the Changes
As you make changes, you will see them reflected in real-time within the Elementor editor, allowing you to preview the new font appearance. Ensure that the font choices and settings align with your website’s design and maintain readability.

Step 10: Save the Modifications
Once you are satisfied with the changes, click on the “Update” button to save your modifications and apply the new font to the selected text element.
Conclusion:
By following these simple steps, you can easily edit fonts in Elementor and create visually appealing typography for your website’s text elements. Elementor’s user-friendly interface and extensive font customization options allow you to enhance the visual appeal and readability of your website’s content. Experiment with different fonts, sizes, and styles to find the perfect combination that aligns with your design concept and delivers an engaging user experience.

0 Comments