

In this tutorial, you will learn how to customize the address field in WP Forms. Before you begin, make sure you have installed and activated WP Forms Pro. If you haven’t already, you can find a link to purchase it in the video description.
You can also watch the video tutorial:
Here’s a step-by-step guide to customizing the address field in WP Forms:
Step 1: Create a New Form
- Hover over WP Forms and click on “Add New” to create a new form.
- Give your form a unique name.
- Select the template that suits your requirements.
- Add other desired fields to the form.
- Save the form.

Step 2: Add the Address Field
- In the form builder area, locate the “Address” field under the “Fancy Fields” section.
- Drag and drop the address field onto the form builder area.
- Click on the address field to access its options.

Step 3: Customize the Address Field
- Under the “General” tab, edit the label name for the address field.
- Choose the address scheme that you prefer from the available options.
- Decide whether the address field should be required or optional.
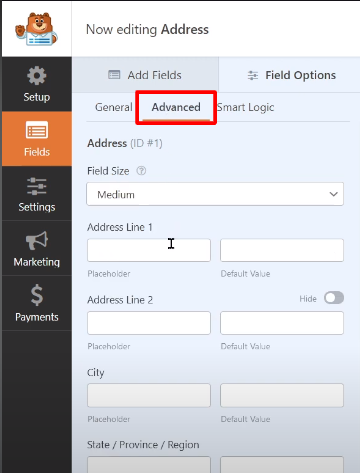
- Proceed to the “Advanced” tab to further customize the field.

Step 4: Customize Subfields
- Under the “Advanced” tab, you’ll find settings for both the address field and its subfields.
- You can choose to show or hide specific subfields by enabling or disabling the respective options.
- This allows you to customize the appearance and functionality of the address field based on your preferences.
Step 5: Save and Preview the Form
- Once you’re satisfied with the customization, click on the “Save” button to save the form.
- Preview the form to see how the address field appears and functions in its customized state.

That’s it! You have successfully customized the address field in WP Forms. Now, when users fill out the form, they will see the customized address field with the chosen label, scheme, and subfield settings.
Remember, this tutorial assumes you have WP Forms Pro installed and activated. If you don’t have the Pro version, make sure to follow the link provided in the video description to purchase it.
Enjoy customizing your address field in WP Forms, and feel free to explore other customization options available in the plugin to further enhance your forms.

0 Comments