In this tutorial, we will guide you on how to create an audio playlist in Elementor. Follow the steps below.
You can also watch the video tutorial:
Having said that, let’s move on to the steps on How To Create an Audio Playlist In Elementor.
Step 1: Create a Page
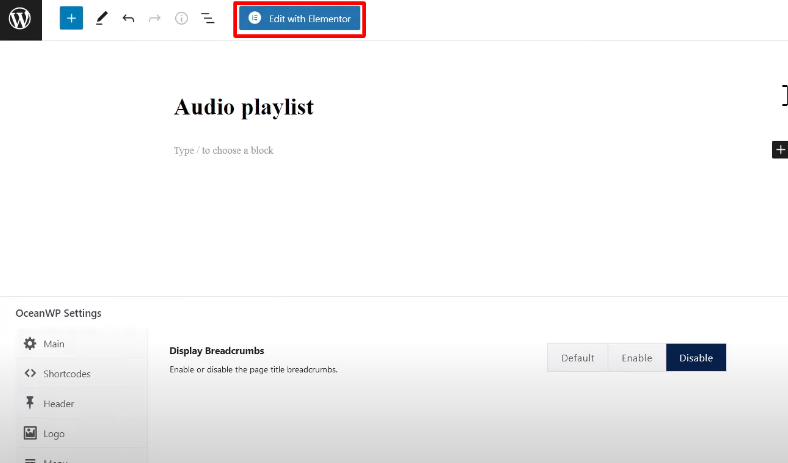
First, you need to create a new page where you want to add the audio playlist. In your WordPress dashboard, go to “Pages” and click on “Add New”. Give the page a unique title and choose the desired content layout. You can disable the page title and breadcrumbs if you prefer. Once you have set up the page, click on “Publish” or “Schedule” to save it.

Step 2: Edit the Page with Elementor
After publishing the page, click on the “Edit with Elementor” button to start editing the page with Elementor.

Step 3: Add a Section and Text Editor Widget
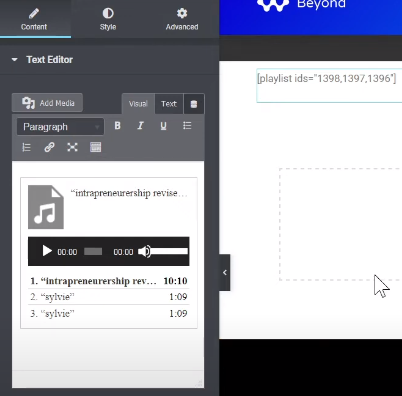
In the Elementor editor, you can start by adding a section to the page. Choose a single row structure for the section. From the Elementor widgets panel, drag and drop the “Text Editor” widget into the section.

Step 4: Create the Audio Playlist
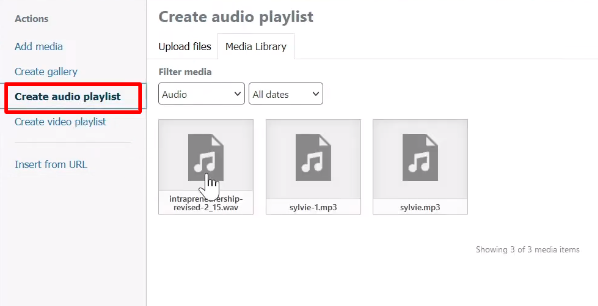
Inside the Text Editor widget, delete any existing content. Click on the “Add Media” button and select the “Create Audio Playlist” option. Upload or select the audio tracks you want to include in the playlist. You can add multiple tracks to the playlist.

Step 5: Insert the Playlist and Customize
After creating the playlist, click on the “Insert New Playlist” button to insert it into the Text Editor widget. You will see the playlist displayed in the widget. Click on the “Update” button to save the changes.

Step 6: Preview the Page
Now, you can preview the page from the front end to see the audio track playlist in action. The playlist will be displayed on the page, and you can customize its design by exploring the style options in the Elementor editor.

By following these steps, you can easily create an audio playlist in Elementor on your WordPress website.
If you have any additional questions or need further assistance, feel free to ask.


0 Comments