

Elementor is a popular WordPress page builder that offers a variety of tools to create engaging websites. In this tutorial, we will guide you through the process of creating a click-to-email link button in Elementor. By following these steps, you can add a button to your website that, when clicked, opens the visitor’s default email client with a new message pre-filled with your specified email address.
You can also watch the video tutorial:
Having said that, let’s move on to the steps on How To Create A Click To Email Link Button In Elementor.
Step 1: Open the Elementor Page Editor:
- Log in to your WordPress dashboard.
- Open the page editor where you want to place the click-to-email link button.
- Add a new section to the page where you want the button to be displayed.
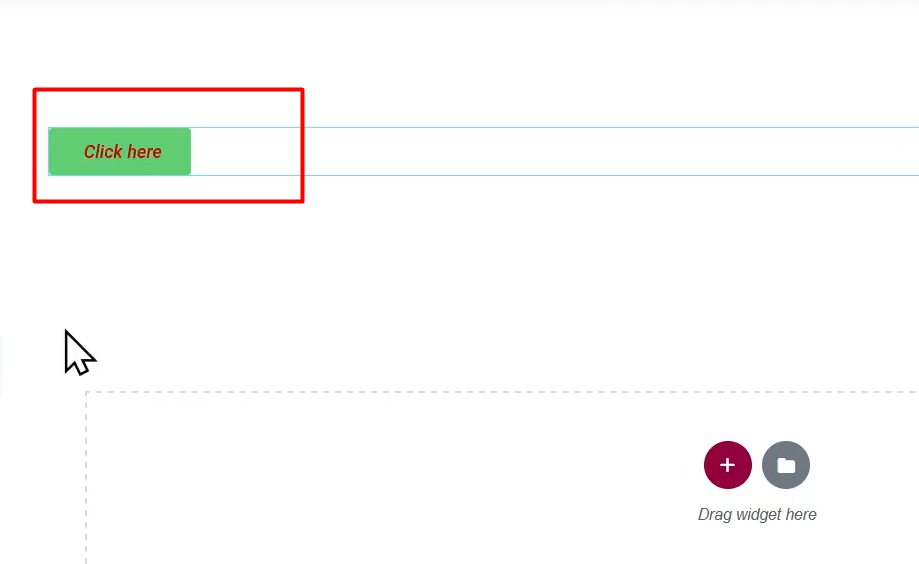
Step 2: Add the Button Element:
- From the Elementor widget panel, locate and drag the “Button” element into the section you created.
- This will insert a button placeholder into the section.
Step 3: Configure the Button Settings:
- On the left-hand side of the Elementor editor, you will find various settings for the button element.
- Alignment: Set the alignment of the button within the section, such as left, center, or right.
- Label: Edit the text that appears on the button. Customize it to say something like “Email Us” or “Contact Us”.

Step 4: Configure the Click-to-Email Functionality:
- Under the button settings, add your email address.
- Prefix your email address with “mailto:”, followed by your email address. For example, “mailto:example@example.com”.
- This click-to-email functionality ensures that when the button is clicked, it opens the visitor’s default email client with a new message window pre-filled with your specified email address.

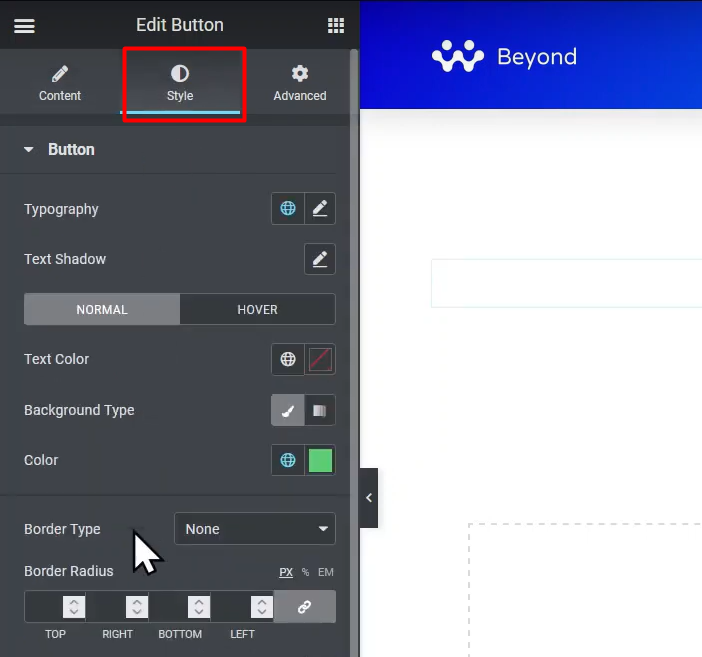
Step 5: Customize the Button Style:
- Switch to the “Style” tab to customize the appearance of the button.
- Color: Change the background color, text color, and hover color of the button to match your website’s design.
- Typography: Adjust the font, size, and other typography settings for the button text.
Step 6: Save and Preview the Page:
- Once you have configured all the desired settings, click the “Update” or “Publish” button to save the page.
- Preview the page from the front end to see the click-to-email link button in action.
- Test the button by clicking on it. It should open the visitor’s default email client with a new message window pre-filled with your specified email address.

Conclusion: By following the steps outlined in this tutorial, you can easily create a click-to-email link button in Elementor. This button provides a convenient way for visitors to contact you by opening their default email client with a new message pre-filled with your specified email address. Customizing the button’s appearance and style ensures it fits seamlessly into your website’s design. Enhance the user experience and encourage communication with your visitors by implementing this click-to-email functionality in Elementor.

0 Comments