

In this tutorial, we will guide you through the process of configuring a custom confirmation message using the Gravity Forms plugin. Gravity Forms is a powerful WordPress plugin that allows you to create and manage forms on your website. By customizing the confirmation message, you can provide personalized feedback or instructions to users after they submit a form. Let’s get started with the step-by-step instructions.
You can also watch the video tutorial:
Having said that, let’s move on to the steps on How To Configure A Custom Confirmation Message In WordPress.
Step 1: Install and Activate Gravity Forms:
- Ensure that you have successfully installed and activated the Gravity Forms plugin on your WordPress website.
- Once activated, you will find the “Forms” tab in the WordPress dashboard sidebar. Click on it to access the Gravity Forms interface.
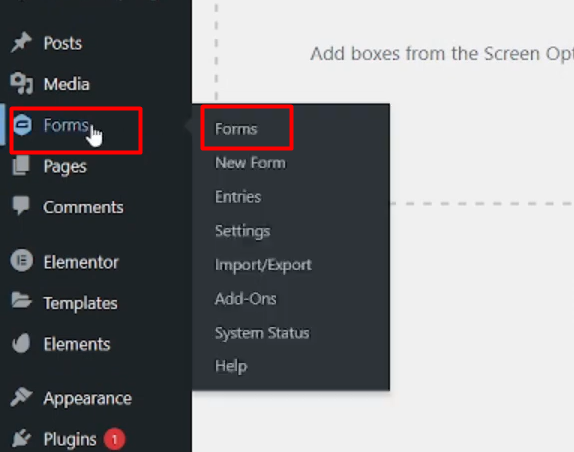
Step 2: Edit the Form and Configure Confirmation Settings:
- Choose the form you want to edit from the list or create a new form if necessary.
- Go to the “Settings” section of the form builder and click on the “Confirmation” option.
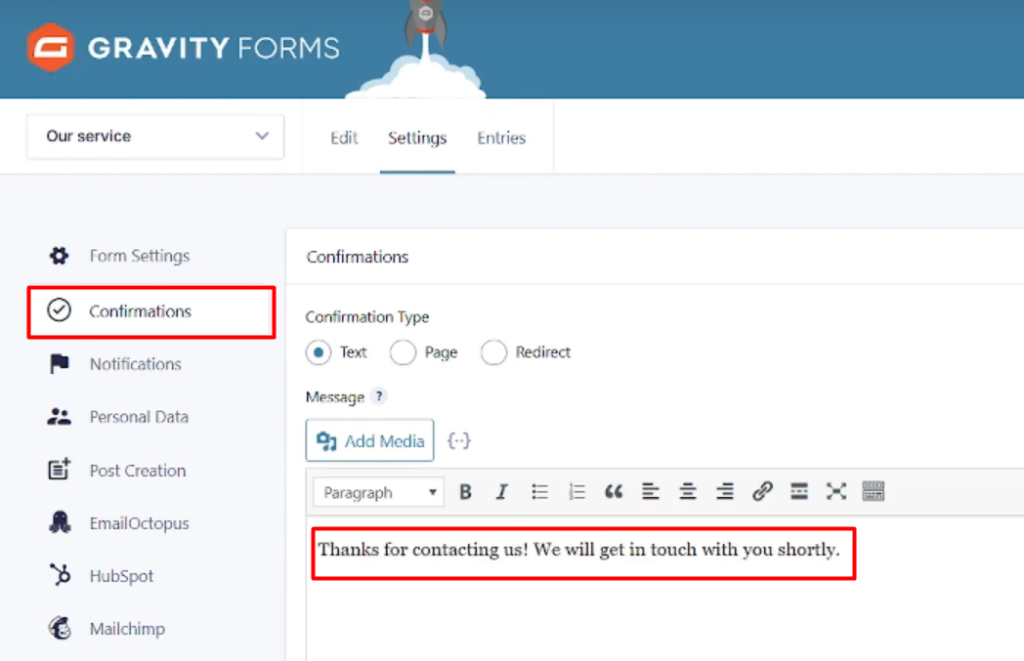
- Select the default confirmation and click on the “Edit” button to customize it.

Step 3: Customize the Confirmation Message:
- In the confirmation settings, you can edit the confirmation message to suit your needs.
- Use the provided text editor to customize the message content, add images, or format the text as desired.
- You can also copy and paste text from external sources into the confirmation message area.
Step 4: Save and Publish the Form:
- Once you have configured the custom confirmation message, click on the “Save Confirmation” button to save your changes.
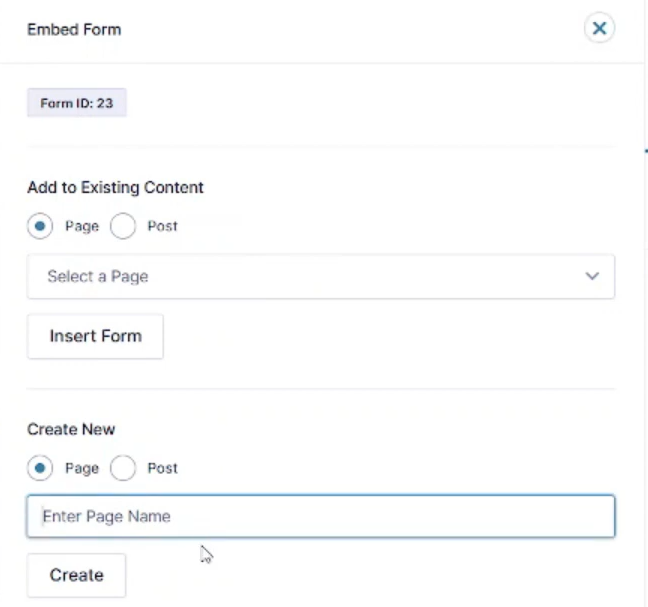
- Return to the form editor by clicking on the “Edit” button.
- On the top-right corner, click on the “Embed” button to generate the form embed code.
- Customize the form embed options as needed, such as choosing the form layout or adjusting settings.
- Copy the provided embed code.
Step 5: Embed the Form on Your Website:
- Navigate to the page or post where you want to embed the form.
- Paste the embed code into the desired location within the page editor.
- Publish the page to make the form live on your website.
Step 6: Test the Form and Confirmation Message:
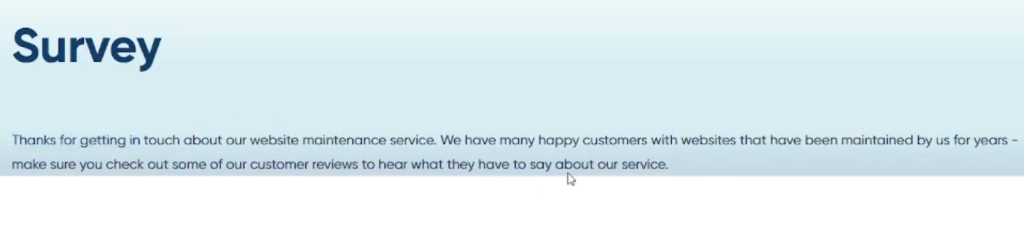
- Visit the page where you embedded the form.
- Fill in the form details and submit it.
- You will see the custom confirmation message you configured to appear after the form submission.
Conclusion:
Congratulations! You have successfully configured a custom confirmation message using the Gravity Forms plugin. By following these steps, you can create personalized confirmation messages that provide relevant information or instructions to users after they submit a form on your website. Gravity Forms offers a wide range of customization options and features to enhance your forms and improve user interactions. Experiment with different form settings and explore the capabilities of the plugin to create engaging and user-friendly forms on your WordPress website.

0 Comments