
Clearing the Elementor cache is an essential step in ensuring that your website displays the most recent changes and resolves any issues related to cached content. In this article, we will provide you with a step-by-step guide on how to clear the Elementor cache, both within Elementor itself and through additional methods if necessary.
You can also watch the video tutorial:
Having said that, let’s move on to the steps on How To Clear Elementor Cache In WordPress.
Step 1: Access the WordPress Dashboard
Start by accessing the WordPress dashboard of your website. Enter your login credentials and navigate to the WordPress admin area.
Step 2: Open Elementor Tools
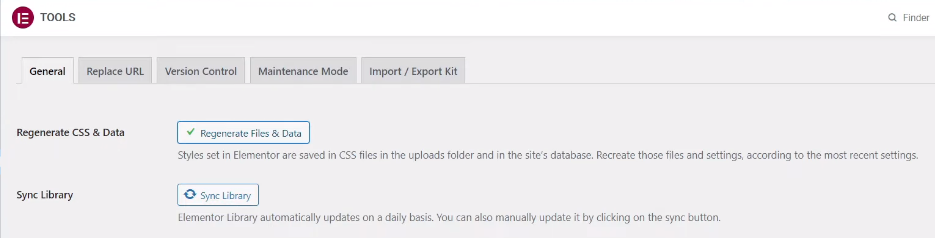
Once you are in the WordPress dashboard, locate the “Elementor” tab in the menu on the left-hand side. Hover over it, and a sub-menu will appear. Click on “Tools” to access the Elementor Tools page.

Step 3: Regenerate Files and Data
On the Elementor Tools page, you will find a button labeled “Regenerate Files and Data.” Click on this button to initiate the cache regeneration process. This process will clear the cached files an data used by Elementor.

Step 4: Wait for the Process to Complete
After clicking the “Regenerate Files and Data” button, allow the cache regeneration process to complete. The duration of this process may vary depending on the size of your website and the amount of cached data. Be patient and wait until the process finishes.
Step 5: Save Your Changes
Once the cache regeneration process is complete, it is important to save any changes you have made in the Elementor editor. Click on the “Update” or “Publish” button within the WordPress editor to ensure your changes are saved.
Additional Steps (if necessary):
Clear All Types of Caches:
If clearing the Elementor cache alone does not resolve the issue, you may need to clear all types of caches, including server caching. Access your hosting provider’s control panel or contact their support to clear the server cache.
Clear WordPress Caching Plugins:
If you are using any WordPress caching plugins such as WP Rocket, W3 Total Cache, or WP Super Cache, navigate to their respective settings and clear the cache. Look for options related to cache clearing or flushing.
Clear Browser Cache:
Clearing your browser cache is crucial to ensure you are viewing the latest version of your website. Open your browser settings, locate the cache or browsing data section, and clear the cache. Restart your browser after clearing the cache.
Try Another Browser or Incognito/Private Window:
If the issue persists, try accessing your website in another browser or in an incognito/private browsing window. This helps rule out any browser-related caching issues and ensures you are viewing the most recent changes.
Conclusion:
Clearing the Elementor cache is a necessary step to ensure that your website reflects the most up-to-date content and design. By following the steps outlined in this guide, you can easily clear the Elementor cache within the Elementor Tools page. If the issue persists, additional steps such as clearing server cache, WordPress caching plugins, and browser cache can be taken to ensure all forms of caching are cleared. Keep your website fresh and updated by regularly clearing the Elementor cache.

0 Comments