Gravatar is basically a web service offered by the company of WordPress’s co-founder Matt Mullenweg named Automattic. It allows the users to create and account and use avatar images on their profiles. This avatar image is then visible on every blog or comment that is posted by the user.
You can also watch the video tutorial:
These gravatars come with a built-in support system in all WordPress websites. However, If a user has not set his gravatar icon, then the WordPress site automatically shows a default avatar image called the mystery man. If you don’t want to use the mystery man as your gravatar, then you can change it to your own desired avatar.
Let us now proceed with this article which will tell you how to change the default gravatar on WordPress, so that you would be able to use your own branded gravatar image.
Changing Default Gravatar Image in WordPress
- First, visit the Settings menu.
- Go to the Discussions page.
- Scroll downwards and go to the Avatars section.
This section is where you can set up and build your gravatar image. You would be given various choices under the default avatar option. These avatars are brought in use when the user has not associated their account with their email address. Right off the back users of WordPress use the default avatar as their profile logo. You can even change that to a blank logo.
If you don’t want to use a custom avatar, you can consider using the other options available to you on the WordPress site. These are auto-generated images available in various designs. The WordPress site uses the author’s email address or name to mathematically generate these images. Make sure you hit the Save button to save your changes.
Using Custom Default Gravatar Images in WordPress
WordPress also provides the feature of creating your own gravatar image. Here are some easy steps using which you can easily add your self-made default gravatar image.
- First, create an image that you want to use as your gravatar.

- Make sure the image is square-shaped, 250×250 pixels configuration.
- Next, to upload this image, go to the Media page.

- Go to the Add new section and upload your gravatar image.
- Click on the Edit link given next to the image.

- Copy the image file URL.

- Paste it in a text editor, say Notepad.

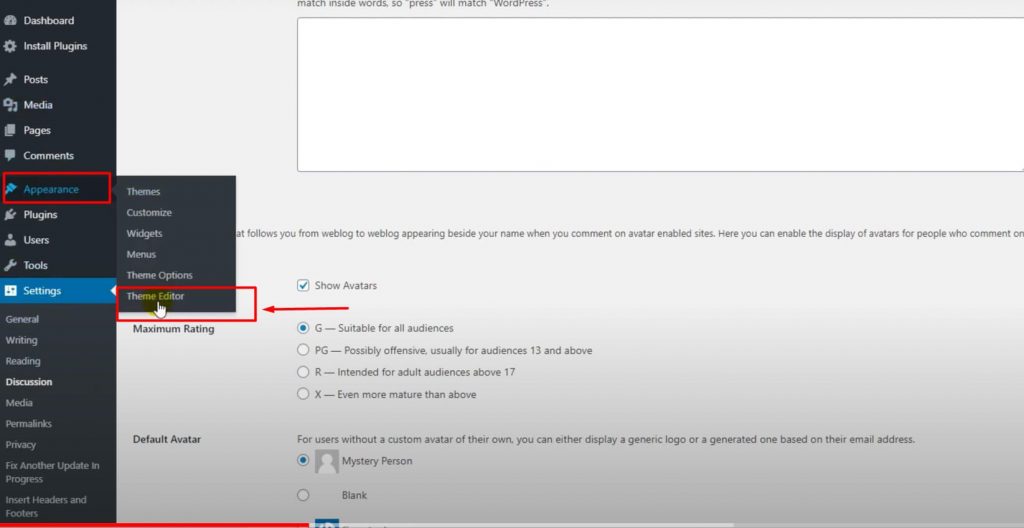
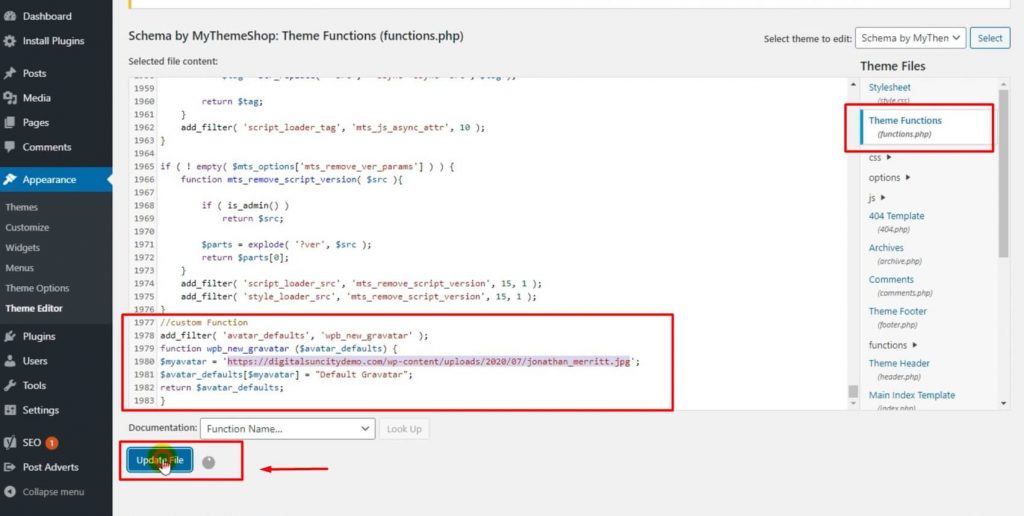
- Add the below given code to your theme’s functions.php file or a site-specific plugin.

  add_filter( 'avatar_defaults', 'wpb_new_gravatar' );
function wpb_new_gravatar ($avatar_defaults) {
$myavatar = 'http://example.com/wp-content/uploads/2017/01/wpb-default-gravatar.png';
$avatar_defaults[$myavatar] = "Default Gravatar";
return $avatar_defaults;
}

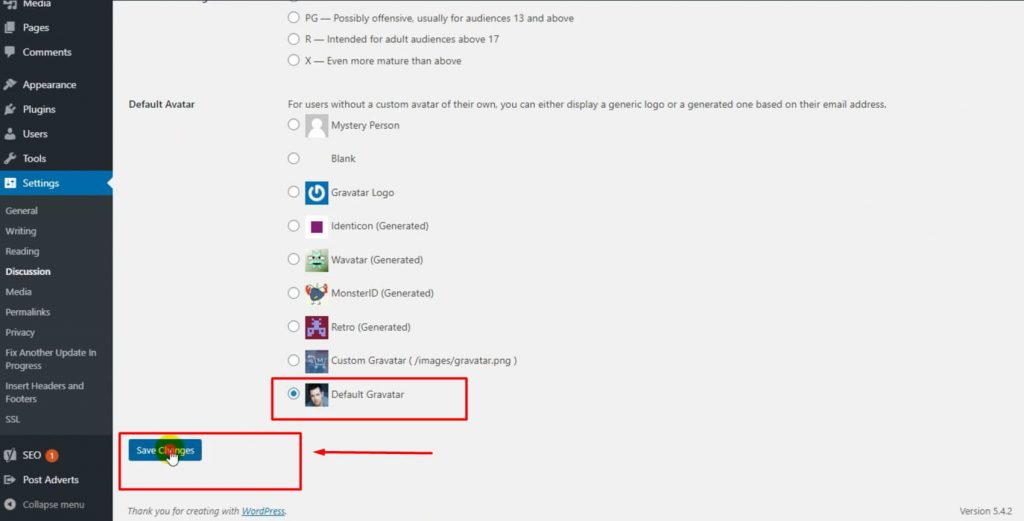
- Next, go to Settings.

- Open Discussions page. You would now be able to see your gravatar added to the default gravatar options.

- Select your custom gravatar which you want to use.
- Click on Save button to save changes.
Your custom avatar would now be visible and in use.
We really hope that this article of ours guides you to change the default gravatar on WordPress and even customise one on your own. If you find yourself stuck in any other WordPress related problem, feel free to ping us up. We would be glad to help you out!


0 Comments