

Do you want your WordPress website’s trash to be automatically emptied?
WordPress will remove anything that’s been in the trash for 30 days by default. However, some users may prefer that the trash be emptied more frequently or less frequently.
In this article, we’ll show you how to set your trash can to empty itself on a daily, weekly, or as-needed basis.
What Is WordPress Trash?
WordPress first included a trash feature in version 2.9. It functions similarly to your computer’s recycle bin or trash.
You can also watch the video tutorial:
In other words, your deleted posts are not permanently deleted, but are instead sent to the trash, where they can be recovered for a limited time.
Anyone can accidentally click the Delete link on a post. That is why WordPress makes restoring deleted posts and pages so simple.
Your WordPress website will delete anything in the trash after 30 days to prevent it from piling up. If you want to prevent WordPress from automatically emptying the trash, read our guide on how to disable automatic trash emptying in WordPress.
What if you want the trash emptied more frequently than once a month? Or perhaps you’d prefer that it be emptied less frequently. Let’s take a look at how you can have it emptied automatically as often as you want.
We’ll go over two approaches in more detail below. The first method is the most user-friendly. To get to your preferred method, click on the links below.
Method 1: Use a Plugin to Empty the WordPress Trash Automatically
You must first install and activate the Change Empty Trash Time plugin. See our step-by-step guide on how to install a WordPress plugin for more information.
After activation, go to your admin dashboard’s Settings » General page. When you get there, scroll to the bottom of the page to find a new ‘Time to empty trash’ setting.
Simply enter the number of days you want WordPress to take to empty the trash. You can, for example, type 1 for daily, 7 for weekly, or 30 for monthly.
If you enter 0, deleted posts and pages will be permanently deleted rather than being placed in the trash.
Take special care when setting the time to empty to 0. Permanently deleted posts and pages can be difficult to recover. Make sure you have a backup plugin installed just in case.
Don’t forget to save your settings by clicking the Save Changes button.
Method 2: Empty the WordPress Trash Automatically with code:
You can also use a code snippet to configure how WordPress trash is empty. This method is not recommended for beginners; instead, if you are unfamiliar with code, use Method 1.

You’ll need to make changes to your wp-config.php file for this method.
If you’ve never edited the wp-config.php file before, read our guide on how to edit the wp-config.php file in WordPress.
Simply insert the following code into your wp-config.php file. It should be near the end of the file, just before the line that says ‘That’s all, stop editing!’ ‘Have fun blogging.’

Code:
define('EMPTY_TRASH_DAYS', 1 ); //Integer is the amount of days
If you leave this code alone, your trash will be emptied once a day. Change the number 1 to a different number, and the trash will be emptied after that number of days.
If you don’t want to use the trash feature at all, set the number to 0. Deleted posts and pages will then be permanently removed from the site without being placed in the trash. Before you begin, make sure you have a backup plugin installed in case you need to restore any accidentally deleted pages.
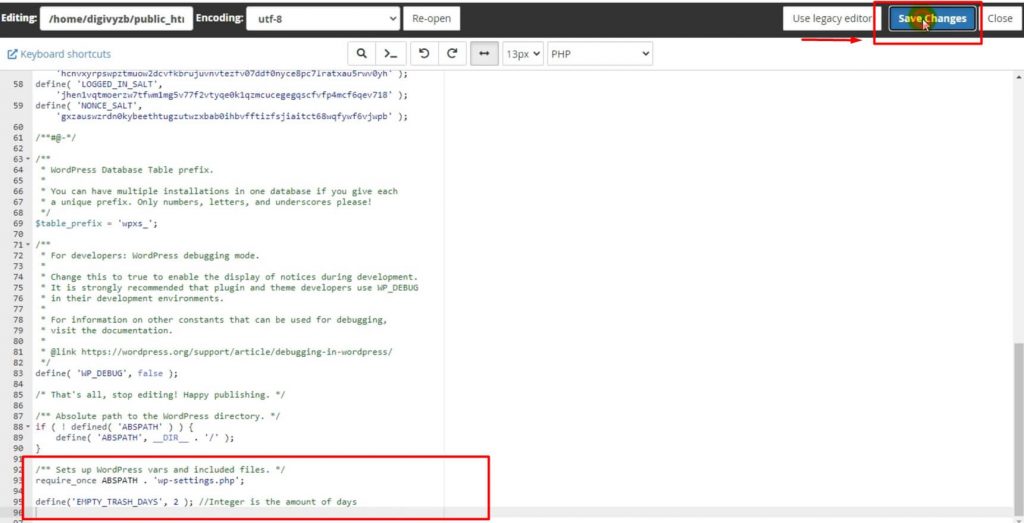
Once you’ve made your changes, remember to save the wp-config.php file.
When you’ve updated your settings, you can go and check if the changes have been made.
As long as you manage to follow all the instructions above properly, the trash will get automatically emptied.
In case you have any more doubts or queries, feel free to check out our website or contact Digital Suncity.
Also Read: How To Add Warning Notice For Visitors In WordPress Website

0 Comments