

WordPress contact forms are an essential tool for website owners to collect information and communicate with their users. In this tutorial, we will show you how to create a contact form in WordPress that allows users to select a specific recipient from a list. By implementing this feature, you can ensure that each form submission is directed to the appropriate person or department.
You can also watch the video tutorial:
Having said that, let’s move on to the steps on How To Allow Users To Select Specific Recipients In WP Forms.
Step 1: Create a Form
- Go to WP Forms in the WordPress admin dashboard and click on “Add New” to create a new form.
- Provide a unique name for your form.
- Select a template from the template library that suits your needs.
- Add fields to your form based on the information you want to collect from users.
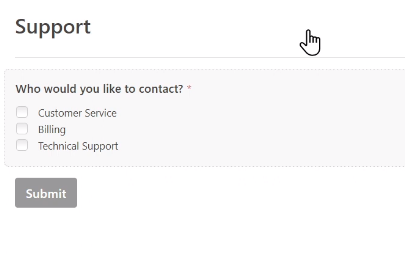
- For the recipient selection, you can use either the Checkboxes field or the Dropdown field, depending on your preference.
- Edit the label of the recipient field to make it clear for users.
- Customize the choices in the field to correspond to the names of the recipients.
- Ensure that the recipient field is set as required.
Step 2: Save the Form
- Once you have added all the necessary fields to your form, click on the “Save” button to save your progress.
Step 3: Set Up Conditional Notifications
- Click on the settings icon (gear icon) of the form you just created.
- In the settings panel, locate the “Notification Settings” section.
- To create conditional notifications, click on the “Add New Notification” button.
- Give your notification a name to identify it (e.g., “Customer Service Notification”).
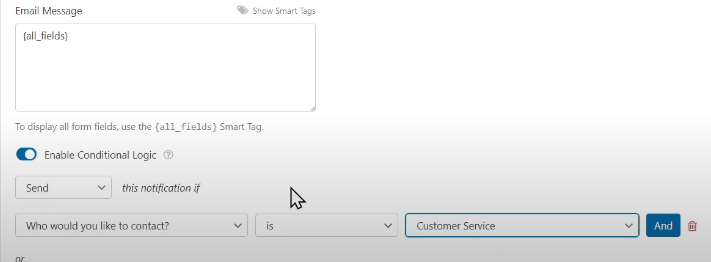
- Customize the content of the notification if desired.
- Enable conditional logic for this notification by checking the corresponding box.
- Set up the conditional email by specifying when this notification should be triggered. For example, select the recipient “Customer Service” and enter the respective email address for that recipient.
- Repeat this process to create additional notifications for each recipient you want to include.
Conclusion:
By following these steps, you can easily create a WordPress contact form that allows users to select a specific recipient. This feature ensures that each form submission is sent directly to the intended recipient, streamlining communication and improving response times. Customizing your contact forms in this way enhances user experience and helps you manage inquiries or requests more efficiently. Implement this functionality in your WordPress contact forms and provide a seamless experience for both users and recipients.

0 Comments