

Forminator is a WordPress plugin that allows you to create and manage forms on your WordPress website. It provides a user-friendly interface and a wide range of form fields and features to build various types of forms, such as contact forms, surveys, quizzes, registration forms, and more. In this tutorial, you will learn how to add a radio field in Forminator Forms plugin for WordPress.
You can also watch the video tutorial:
Having said that, let’s move on to the steps on How To Add Radio Field In Forminator Forms In WordPress.
To begin, log in to your WordPress dashboard and navigate to the Forminator plugin by hovering over the sidebar and clicking on “Forms.” In the Forminator Forms window, you have the option to either create a new form or edit an existing one. For this tutorial, we will focus on editing an existing form.

Within the Form Builder area, you will find the fields that are already added to the form. If you need to remove any fields, simply click on the respective settings icon and select “Delete Field” from the menu.
To add a radio field, locate the “Insert Fields” button and click on it. From the available field options, select the “Radio” field and click on the “Insert Field” button. A pop-up window will appear, allowing you to configure various settings for the radio field.

First, edit the label name of the radio field and provide a description if necessary. Scroll down to the options section, where you can edit the names of the options and add new ones by clicking on the “Add Option” button. Make sure to enter the label name for each option.

If you wish to include images in the radio options, check the box next to “Enable Images.” You can then upload and assign images to each option. Should you need to remove an option, click on the respective settings icon and select “Delete Option.”
Move to the “Settings” tab to make the field required or optional by selecting the appropriate option. You can also set the layout of the field. Explore the other tabs, such as “Calculations” and “Styling,” to further customize the field based on your requirements.
Once you have configured all the settings, click on the “Apply” button to save your changes. Finally, update the form by clicking on the “Update” button.
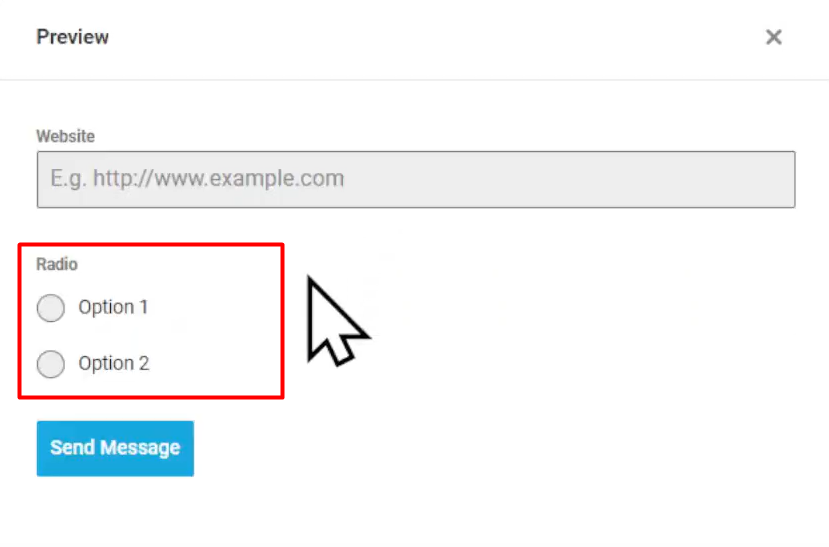
To preview the form, click on the “Preview” button, and you will see that the radio field has been successfully added with the specified options.
Congratulations! You have now learned how to add a radio field using the Forminator Forms plugin for WordPress. With this knowledge, you can create engaging and interactive forms that suit your website’s needs.

0 Comments