In this tutorial, you will learn how to add a number field using the Forminator Forms plugin for WordPress. The number field allows users to enter numerical values in a form, making it suitable for various applications such as collecting ages, quantities, or measurements. Follow the steps below to incorporate a number field into your Forminator form effortlessly.
You can also watch the video tutorial:
Having said that, let’s move on to the steps on How To Add a Number Field In Forminator Forms In WordPress.
Step 1: Access Forminator Forms
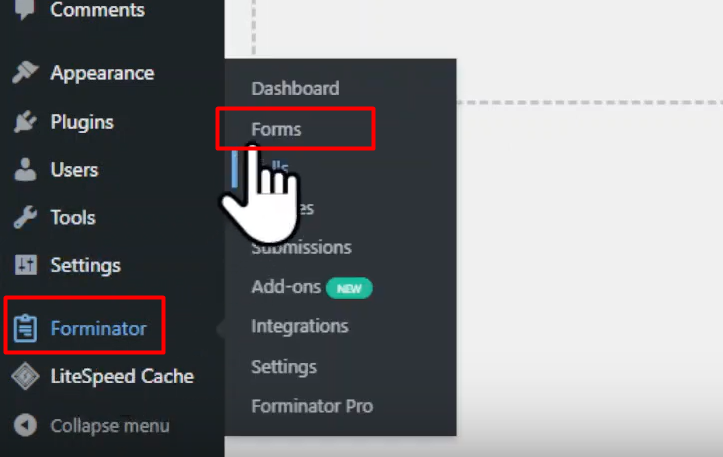
- Locate the Forminator plugin in the WordPress sidebar.
- Hover over it and click on “Forms” to access the Forminator Forms section.

Step 2: Create a New Form
- Once in the Forminator Forms section, click on the “Create” button.
- In the pop-up window, select the “Blank” template for your form.
- Provide a name for your form and click on “Create” to proceed.

Step 3: Enter the Form Builder
- After creating the form, you will be directed to the Form Builder area.
- This is where you can design and customize your form.

Step 4: Add the Number of Field
- To add a number field, click on the “Insert Fields” button.
- From the list of available field options, choose the “Number” field.
- Click on the “Insert Field” button to add the number field to your form.

Step 5: Customize Field Settings
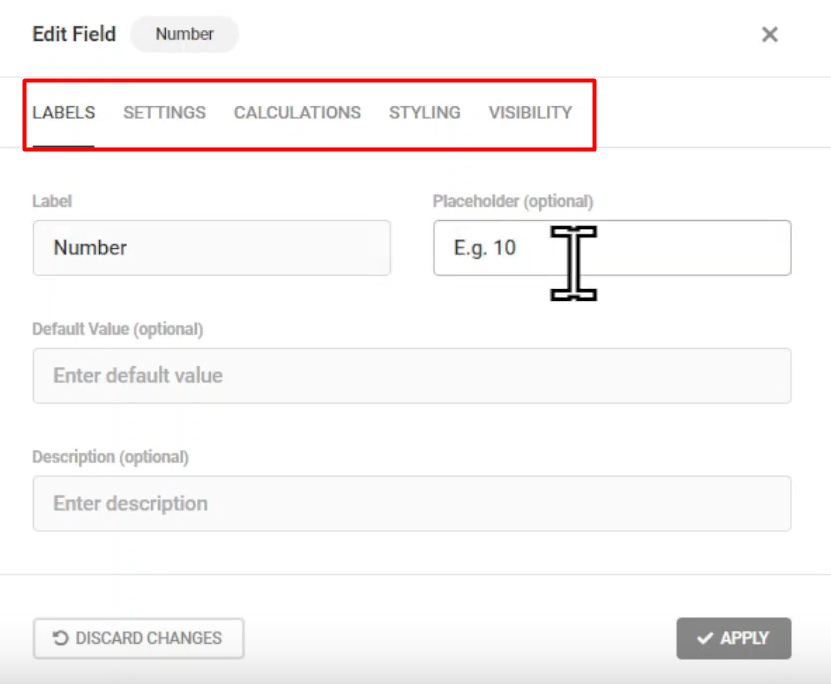
- In the field settings, you can edit the label name and placeholder text for the number field.
- Additionally, you can add a description if needed.
Step 6: Configure Field Options
- Move to the “Settings” tab to further customize the number field.
- Make the field optional or mandatory by selecting the appropriate option.
- Set number limits by specifying minimum and maximum values.

Step 7: Customize Error Messages
- If necessary, customize the error messages that will be displayed for the number field.
- This helps guide users when they enter invalid data.
Step 8: Choose Display Format
- Under the “Settings” tab, choose how you want the value of the number field to be displayed.
- Options include decimal places, currency symbols, and thousands separators.
Step 9: Enable Calculations (Optional)
- In the “Calculations” tab, decide whether the number field should be used in calculations within the form.
- Enable or disable this option based on your requirements.

Step 10: Apply Styling
- Under the “Styling” tab, add custom CSS to style the number field according to your preferences.
- This ensures the field aligns with your overall form design.
Step 11: Control Field Visibility
- In the “Visibility” tab, set rules to control when the number field is visible based on specific conditions.
- This enhances the dynamic behavior of your form.
Step 12: Apply Changes and Publish
- Once you have configured all the settings, click on the “Apply” button to save the changes made to the number field.
- To publish the form, click on the “Publish” button, making it accessible to users.
Step 13: Preview the Form
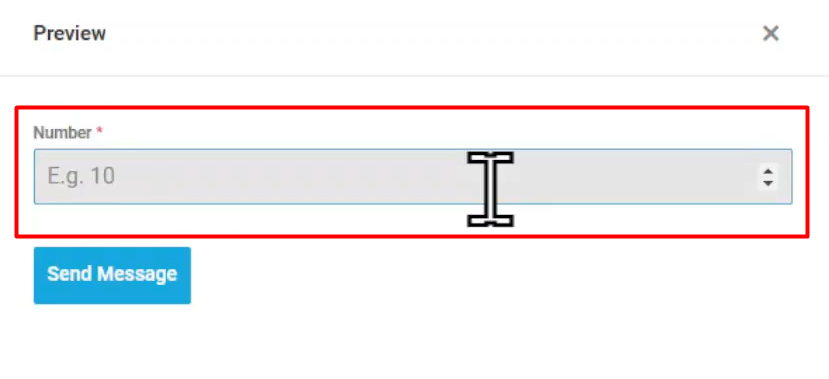
- Use the “Preview” button to see a preview of the form with the newly added number field.
- Verify that the number field is displayed correctly and users can input numerical values.

Conclusion: By following these step-by-step instructions, you have successfully added a number field to your Forminator form. This field allows users to input numerical data, enhancing the functionality and versatility of your WordPress forms. Experiment with different settings and customization options to create forms that meet your specific requirements.


0 Comments