

In this video tutorial, we will guide you through the process of using image recaptcha with the Contact Form 7 plugin in WordPress. Image recaptcha is a security feature that helps protect your forms from spam and automated submissions. By following these steps, you can add image recaptcha to your Contact Form 7 forms and enhance the security of your website. Let’s get started!
You can also watch the video tutorial:
Having said that, let’s move on to the steps on How To Add Image Re-captcha In Contact Form 7.
Step 1: Install and Activate Contact Form 7 Plugin:
- Make sure you have successfully installed and activated the Contact Form 7 plugin on your WordPress website.
- This plugin provides a user-friendly interface for creating and managing forms.
Step 2: Create a Contact Form:
- From the dashboard sidebar, go to “Contact” and select “Add New”.
- Provide a form title and customize the form fields according to your requirements.
- Click on the “Save” button to save the form settings.

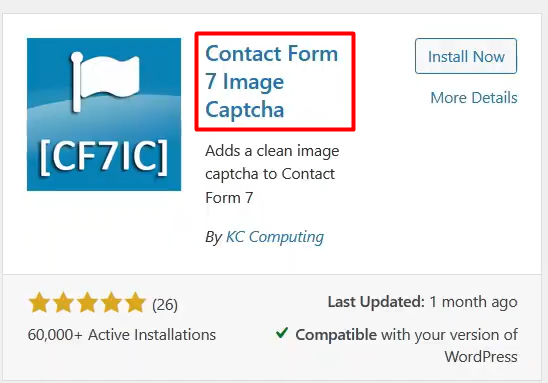
Step 3: Install the Contact Form 7 Image Captcha Plugin:
- From the sidebar, hover over “Plugins” and click on “Add New”.
- In the search bar, type “Contact Form 7 Image Captcha” and press Enter.
- Install the plugin by clicking on the “Install Now” button.
- Once installed, activate the plugin.
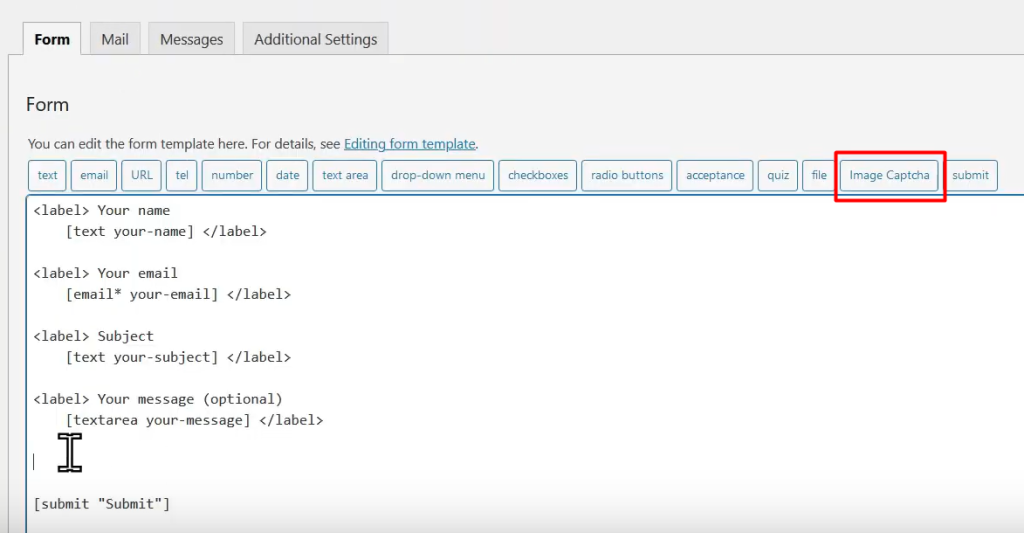
Step 4: Add Image Recaptcha to the Contact Form:
- Go back to the dashboard and click on “Contact” and select “Contact Forms”.
- Locate the form to which you want to add image recaptcha and click on the “Edit” button.
- The Contact Form Builder will open, and you will see the “Image Captcha” tag available.
- Click on the “Image Captcha” tag and then click on the “Insert Tag” button to add it to your form.
- Save the form settings to apply the changes.
Step 5: Embed the Form on a Page:
- Copy the form shortcode from the contact form editor.
- Hover over “Pages” in the sidebar and click on “Add New”.
- Give the page a title and paste the form shortcode into the page editor.
- Click on the “Publish” button to publish the page.

Step 6: Test the Form:
- Visit the page where you embedded the form.
- You will see the image recaptcha added to the form.
- Fill in the required fields and complete the Recaptcha verification.
- Submit the form to see if it functions correctly.
Conclusion:
Congratulations! You have successfully added image recaptcha to your Contact Form 7 forms using the Contact Form 7 Image Captcha plugin. Image recaptcha provides an additional layer of security by verifying that the user is not a robot. By following the steps outlined in this tutorial, you can enhance the spam protection for your forms and ensure the security of user submissions. Experiment with different form configurations and explore additional features offered by Contact Form 7 to customize and optimize your forms according to your website’s requirements.

0 Comments