

Adding a dynamic date to the footer of your website can provide valuable information and ensure that important date-related content, such as copyright information, remains up to date without manual intervention. In this step-by-step guide, we will show you how to add a dynamic date in the footer of your website using the OceanWP theme in WordPress.
You can also watch the video tutorial:
Having said that, let’s move on to the steps on How To Copy Elementor Page To Another Site In WordPress.
Step 1: Access the WordPress Dashboard
Begin by accessing the WordPress dashboard of your website. Enter your login credentials and navigate to the administration area.
Step 2: Customize the Theme
From the WordPress dashboard, click on “Customize” to access the theme customization options. This will open the live preview of your website with customization controls.

Step 3: Locate the Footer Settings
In the customization options, look for the “Footer” option among the available sections and click on it. This will display the customization settings specifically related to the footer area of your website.

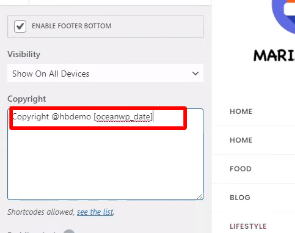
Step 4: Add the Dynamic Date
Within the Footer settings, locate the text area where you want to add the dynamic date. This may be the copyright section or any other area you wish to display the date.
Step 5: Insert the Shortcode
Add the shortcode [current_year] in the text area. The OceanWP theme provides this shortcode, which automatically displays the current year. The shortcode will be replaced with the current year when the website is viewed.
Step 6: Customize the Footer
If desired, you can further customize the text and background color of the footer to match your website’s design and branding. Take your time to adjust the settings according to your preferences.

Step 7: Save and Publish the Changes
Once you are satisfied with the modifications, click on the “Publish” button to save and apply the changes to your website. This will make the dynamic date appear in the footer section of your website.

Step 8: Preview the Dynamic Date
Visit your website and scroll down to the footer section. You will now see the dynamic date displayed, automatically updating to the current year. This ensures that the date remains accurate without requiring manual updates each year.
Conclusion:
By following these steps, you can easily add a dynamic date in the footer of your website using the OceanWP theme in WordPress. The [current_year] shortcode provided by the theme enables the automatic updating of the date, ensuring that your footer content, such as copyright information, remains up to date without manual intervention. Enhance the functionality and professionalism of your website by incorporating a dynamic date in the footer using the OceanWP theme.

0 Comments