

In this video tutorial, we will guide you through the process of adding an email field to your contact forms using the Forminator Forms plugin in WordPress. An email field allows users to enter their email addresses, enabling effective communication and response to form submissions. By following these simple steps, you can enhance your contact forms with an email field using Forminator Forms. Let’s get started!
You can also watch the video tutorial:
Having said that, let’s move on to the steps on How To Add an Email Field In The Forminator Forms In WordPress.
Step 1: Access the Forminator Forms Plugin:
- From the WordPress dashboard sidebar, hover over “Forminator” and click on “Forms” in the submenu.
- This will take you to the Forminator Forms window, where you can manage your forms.
Step 2: Edit an Existing Form:
- Choose the form you want to edit by clicking on it or create a new form as per your requirement.
- In the Form Builder area, you can see the fields and settings for the selected form.

Step 3: Add an Email Field:
- To add an email field, click on the “Insert Field” button.
- From the list of available fields, select the “Email” field and click on “Insert Field”.
- A pop-up window will appear where you can configure the email field settings.

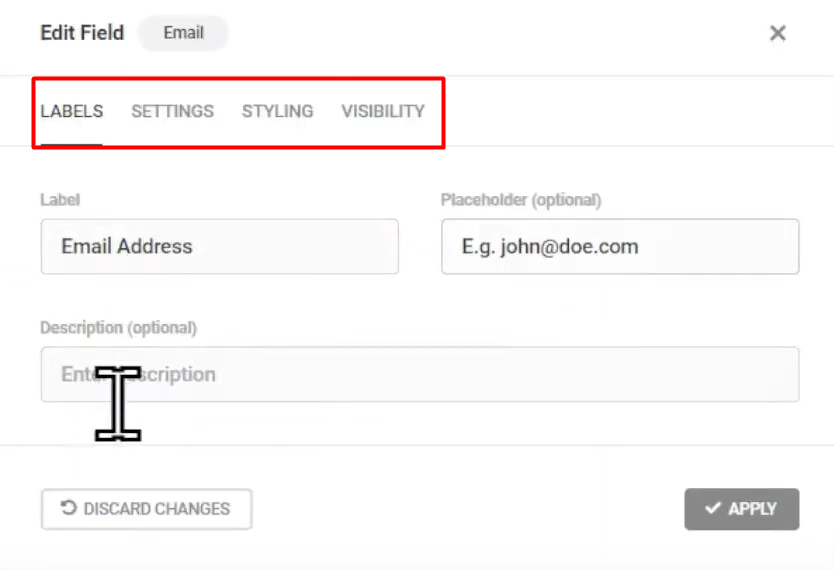
Step 4: Configure Field Settings:
- In the pop-up window, edit the label name to specify what the field represents (e.g., “Email”).
- You can also edit the placeholder text to provide instructions or examples for users entering their email addresses.
- If needed, add a description to provide additional information about the field.
- Under the “Settings” tab, choose whether the email field should be mandatory or optional.
- Optionally, configure field validation settings to ensure the entered email addresses are in the correct format.
- Customize the field’s appearance by adding custom CSS in the “Style” tab.
- Use the “Visibility” tab to control the field’s visibility based on specific conditions, if required.
Step 5: Position and Update the Form:
- Arrange the fields’ position by using the drag-and-drop functionality to suit your form layout.
- Once you are satisfied with the changes, click on the “Update” button to save the form.
Step 6: Preview and Test the Form:
- Click on the “Preview” button to see how the form appears to users.
- Test the email field by entering a valid email address and submitting the form.

Conclusion:
Congratulations! You have successfully added an email field to your contact forms using the Forminator Forms plugin in WordPress. The email field enables users to provide their email addresses, facilitating effective communication and response to form submissions. By following the steps outlined in this tutorial, you can customize and enhance your contact forms to gather email information from users effortlessly. Explore additional features offered by Forminator Forms to further optimize and customize your forms according to your website’s requirements.

0 Comments