

Adding variable products to your WooCommerce store allows you to offer customers different options and variations of a single product. Whether it’s different colors, sizes, or other attributes, variable products provide flexibility and customization. In this tutorial, we will walk you through the process of adding a variable product using WooCommerce. Let’s get started!
You can also watch the video tutorial:
Having said that, let’s move on to the steps on How To Add A Variable Product Using Woocommerce Plugin.
Step 1: Accessing the Product Creation Page
- Hover over the “Products” menu in your WordPress admin dashboard and click on “Add New”.
- Enter the title of your product in the provided field and add a description if desired.

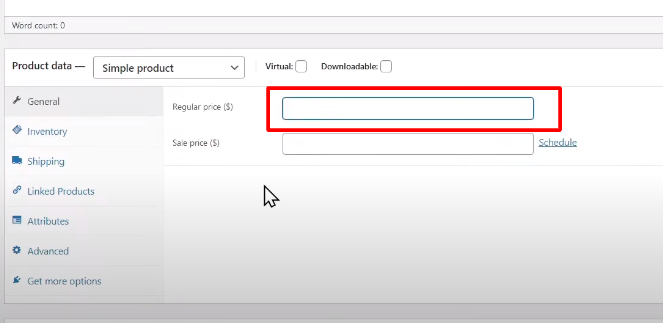
Step 2: Setting the Price and Image
- Set the price for your product. If the product does not have variations, simply enter the price here.
- Choose a featured image for your product by clicking on the “Set product image” link.
Step 3: Making the Product a Variable Product
- To make the product a variable product, select “Variable product” from the product type drop-down menu.
- If applicable, enter the SKU code for the product.

Step 4: Adding Attributes
- Click on the “Attributes” tab to add attributes for creating variations.
- Click on the “Add” button to add custom attributes. For example, let’s add the attribute “Color”. Make sure to check the box to enable variations for this attribute.
- Enter the color options as attribute values, separated by a vertical pipe (|).
- Save the attribute by clicking on the “Save attribute” button. Repeat the process to add more attributes, such as “Size”.

Step 5: Creating Variations
- Click on the “Variations” tab.
- From the “Add variations” drop-down menu, select “Create variations from all attributes”.
- WooCommerce will automatically generate all possible combinations of variations based on the attributes you added.
- Edit each variation by expanding it. Enter the price, weight, SKU code, and any additional information specific to each variation.

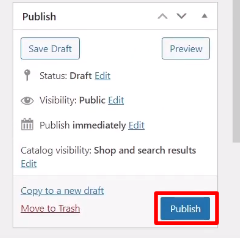
Step 6: Publishing the Product
- Once you have configured the variations, click on the “Publish” button to publish the product.
- Assign the product to a specific category by selecting it from the categories section.
Step 7: Viewing the Variable Product
- Finally, view the product on your WooCommerce website.
- Customers will see drop-down boxes that allow them to select the variation options.
- When a variation is selected, the price and other relevant information associated with that variation will be displayed.

Conclusion: Congratulations! You have successfully added a variable product to your WooCommerce website. By following the step-by-step instructions in this guide, you can offer customers different variations of a single product, enhancing their shopping experience and providing more options. Remember to review your product details and variations carefully before publishing to ensure accuracy.

0 Comments