

In the world of blogging, visual content plays a vital role in capturing and retaining readers’ attention. By adding a gallery to your blog post, you can showcase multiple images within a single post, creating a visually appealing and engaging experience for your audience. In this tutorial, we will explore how to add a gallery to your blog post using the OceanWP theme in WordPress.
You can also watch the video tutorial:
Having said that, let’s move on to the steps on How To Add A Gallery To Your Blog Post In WordPress.
Step 1: Access the WordPress Dashboard:
Log in to your WordPress website and navigate to the dashboard. This is where you can manage and customize various aspects of your site.
Step 2: Go to Blog Posts:
In the dashboard menu, hover over “Posts” and click on “All Posts.” This action will display a list of all your blog posts.

Step 3: Edit the Desired Blog Post:
Scroll through the list of posts and locate the post to which you want to add a gallery. Click on the “Edit” link associated with that post. This action will open the post editor.

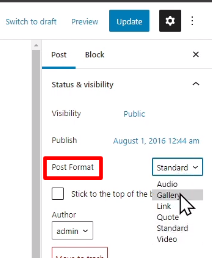
Step 4: Set Post Format to Gallery:
In the post editor sidebar, locate the “Post Format” section. Under this section, you will find the “Gallery” option. Select “Gallery” as the post format for your blog post.
Step 5: Configure Gallery Settings:
Scroll down the post editor page, and you will find additional settings related to the gallery. These settings allow you to customize the gallery display and behavior.

Step 6: Add Images to the Gallery:
To populate the gallery with images, click on the “Add Images” button. This action will open the media library.
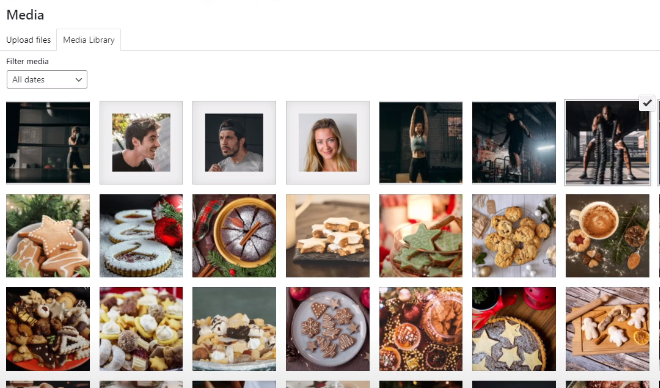
Step 7: Select or Upload Images:
From the media library, choose the images you want to include in the gallery. You can either select images that are already uploaded or upload new images from your device.
Step 8: Update the Post:
After selecting or uploading the desired images, click on the “Update” button to save the changes made to the blog post.

Step 9: View the Gallery on Your Blog Post:
Now, when you view the blog post on the front-end of your website, you will see that the gallery has been added. Visitors can click on the images to view them in a larger size or navigate through the gallery.

Conclusion:
By following the steps outlined above, you can easily add a gallery to your blog post using the OceanWP theme in WordPress. A gallery allows you to showcase multiple images in a visually appealing manner, enhancing the engagement and interactivity of your content. Take advantage of this feature to create captivating blog posts that leave a lasting impression on your readers.

0 Comments