

In this tutorial, we will guide you through the process of adding a date picker field to your forms in WordPress using the Forminator Forms plugin. The date picker field allows users to select a specific date from a calendar, making it useful for collecting date-related information. Follow along to learn how to incorporate this feature into your WordPress website.
You can also watch the video tutorial:
Having said that, let’s move on to the steps on How To Add A Datepicker Field In Forminator Forms In WordPress.
Step 1: Accessing the Forminator Forms Editor:
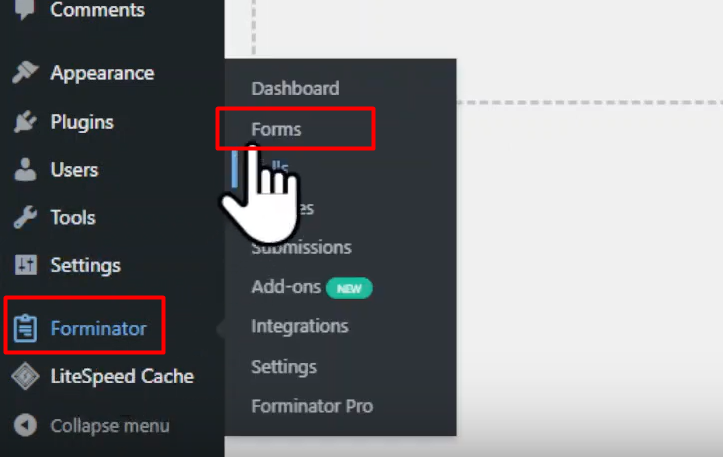
- Log in to your WordPress dashboard and navigate to the Forminator Forms plugin.
- Hover over “Forminator” in the sidebar and click on “Forms” in the submenu that appears.
- This will open the Forminator Forms window, where you can create new forms or edit existing ones.
Step 2: Editing an Existing Form:
- To edit an existing form, locate the desired form in the Forminator Forms window and click on it.
- This will take you to the form builder area, where you can add and configure fields.

Step 3: Adding the Date Picker Field:
- In the form builder area, click on the “Insert Fields” button to add a new field to your form.
- From the list of available fields, select the “Date Picker” field option.
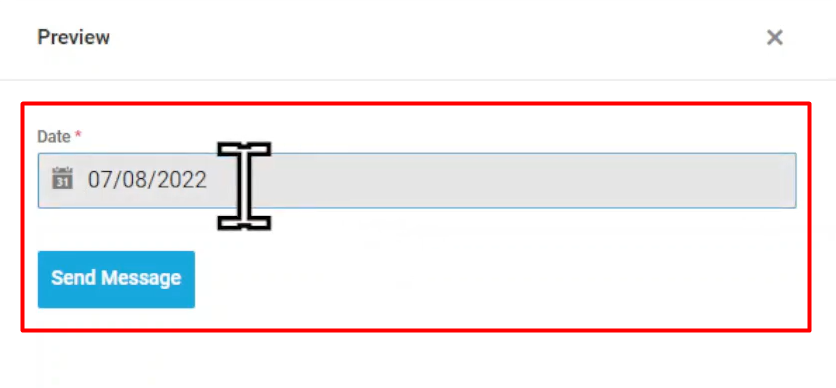
- The date picker field allows users to select a specific date from a calendar.

Step 4: Configuring the Date Picker Field Settings:
- After adding the date picker field, you can customize its settings.
- Select the type of date picker field you prefer, such as a calendar format, drop-down menu, or text input.
- Edit the label name and placeholder text to provide clear instructions to the users.
- Specify the desired date format for consistency.
- Customize the field further based on the selected type (calendar, drop-down, or text input) by exploring the related settings.
- Under the “Settings” tab, determine whether the field is required or optional.
- Set a default date if desired and configure other settings based on your requirements.
- Utilize the “Limit” tab to establish a date range or limit users to select from specific dates.
- Adjust the field’s styling and visibility under the respective tabs.

Step 5: Applying and Previewing the Form:
- Once you have configured the date picker field settings, click on the “Apply” button to save the changes.
- Update the form to ensure the changes take effect.
- To preview the form and see the date picker field in action, click on the “Preview” button.
Conclusion:
By following the steps outlined in this tutorial, you can easily add a date picker field to your forms in WordPress using the Forminator Forms plugin. The date picker field allows users to select a specific date from a calendar, enhancing the functionality and user experience of your forms. Incorporate date-related information seamlessly into your WordPress website by utilizing the Forminator Forms date picker field.

0 Comments