

Forminator Forms is a powerful plugin that allows you to create custom forms in WordPress. In this tutorial, we will guide you through the process of adding a checkbox field to your forms using the Forminator Forms plugin. Checkboxes are useful for providing users with multiple options to select from. Let’s dive in and learn how to incorporate checkboxes into your WordPress forms.
You can also watch the video tutorial:
Having said that, let’s move on to the steps on How To Add A Checkbox Field In Forminator Forms In WordPress
Step 1: Accessing the Forminator Forms Editor:
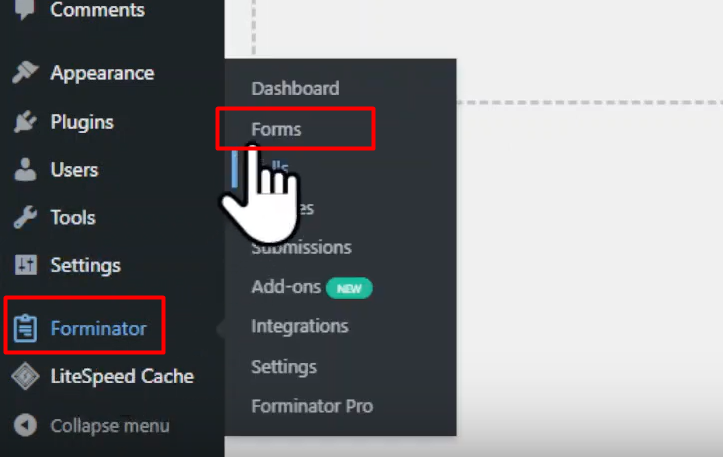
- Log in to your WordPress dashboard and navigate to the Forminator Forms plugin.
- Hover over “Forminator” in the sidebar and click on “Forms” in the submenu that appears.
- This will open the Forminator Forms window, where you can create new forms or edit existing ones.
Step 2: Creating a New Form:
- To create a new form, click on the “Create” button in the Forminator Forms window.
- In the pop-up, select the template that suits your requirements. For this tutorial, we will choose a blank template.
- Give your form a name and click on the “Create” button.

Step 3: Adding the Checkbox Field:
- In the form builder area, click on the “Insert Fields” button to add a new field to your form.
- Select the “Checkbox” field option from the list of available fields.
- The checkbox field allows users to select multiple options from a list.

Step 4: Configuring the Checkbox Field Settings:
- After adding the checkbox field, you can customize its settings.
- Edit the label name and provide a field description, if necessary.
- Scroll down to the options section and edit the default options or add new options by clicking on “ADD option.”
- Customize the label names for each option.
- Enable the “Images” option if you want to use images for the checkboxes and upload or select images for each option.
- Under the “Settings” tab, specify whether the field is mandatory or optional.
- Choose the desired layout for the checkboxes.
- Explore the “Calculations” and other tabs to further customize the field if needed.

Step 5: Applying and Previewing the Form:
- Once you have configured the checkbox field settings, click on the “Apply” button to save the changes.
- Publish the form by clicking on the “Publish” button.
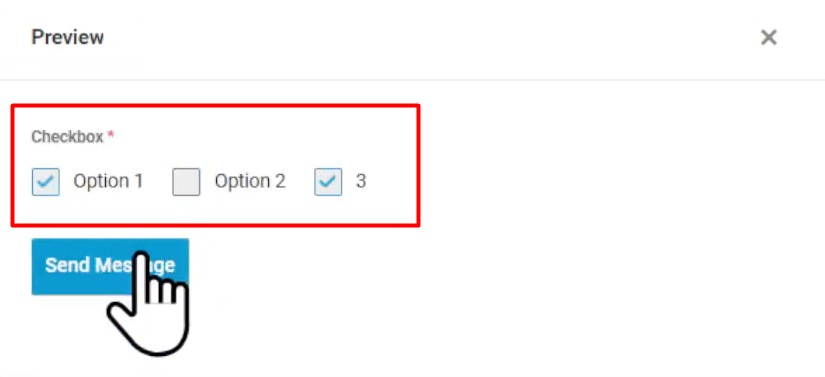
- To preview the form and see the checkbox field in action, click on the “Preview” button.
Conclusion:
By following the steps outlined in this tutorial, you can easily add a checkbox field to your forms in WordPress using the Forminator Forms plugin. Checkboxes provide users with multiple options to select from, making it convenient for gathering specific information. Enhance your forms by incorporating checkbox fields and collect data efficiently on your WordPress website.

0 Comments