

Introduction:
Creating contact forms for your WordPress website often requires knowledge of HTML and CSS. However, in this video tutorial, we will show you an easy way to create a contact form without the need for HTML or CSS coding. By using a plugin called Forminator, you can quickly and effortlessly build contact forms with a user-friendly interface. Let’s get started!
You can also watch the video tutorial:
Having said that, let’s move on to Easiest Way To Create Contact Forms In WordPress Using Forminator Forms Plugin.
Step 1: Install and Activate the Forminator Plugin:
- From your WordPress dashboard, navigate to “Plugins” and click on “Add New.”
- In the search bar, type “Forminator”
- Click on “Install Now” and then activate the plugin.

Step 2: Configure the Forminator Plugin:
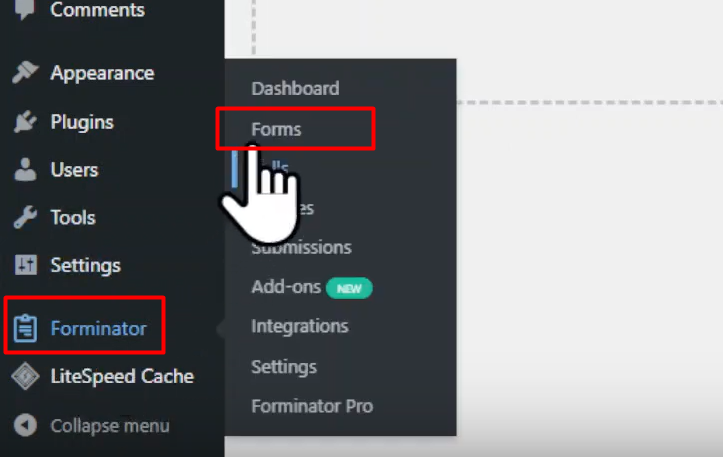
- In the WordPress sidebar, hover over “Forminator” and click on “Forms.”
- Click on “Create” to start creating a new form.
- Choose a template for your form. In this tutorial, we will select the “Contact” template.
- Give your form a name and click on “Create.”
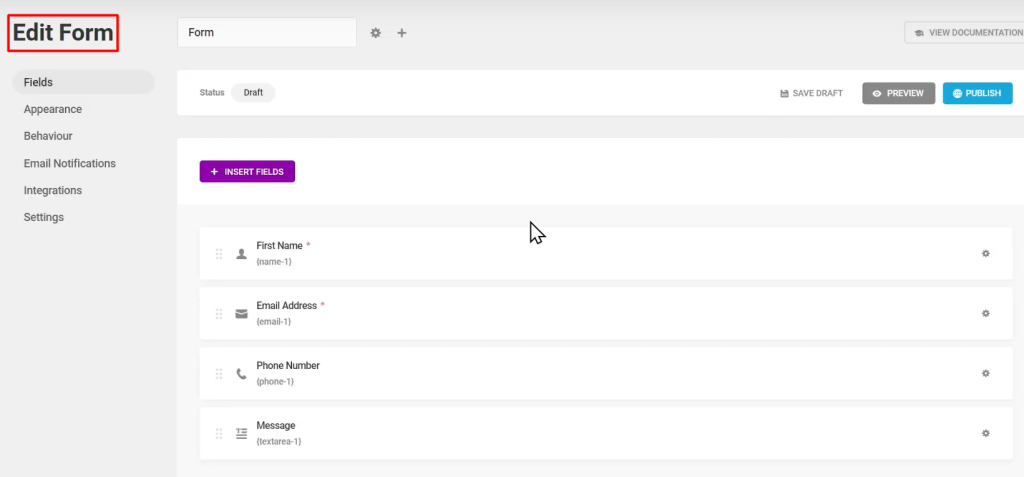
Step 3: Customize the Form:
- The form builder interface will appear, displaying various fields.
- Click on each field to customize its name and settings. For example, you can edit the label, placeholder, and format of the fields.
- To add more fields, click on “Insert Fields” and choose from the available options.
- Rearrange the fields by dragging and dropping them as desired.
- Under the “Appearance” tab, you can select a design style for your form.
- Once you are satisfied with the changes, click on “Publish” to save the form.
Step 4: Insert the Form Into a Page:
- To display the form, create a new page by hovering over “Pages” and clicking on “Add New.”
- Give the page a title, such as “Contact Us,” and publish the page.
- Switch to the code editor and paste the shortcode generated by Forminator.
- Click on “Update” to save the changes.

Step 5: Test the Contact Form:
- Visit the page where you inserted the form and verify that it is displayed correctly.
- Fill in the form and submit it to test its functionality.
- You will see a success message upon successful form submission.

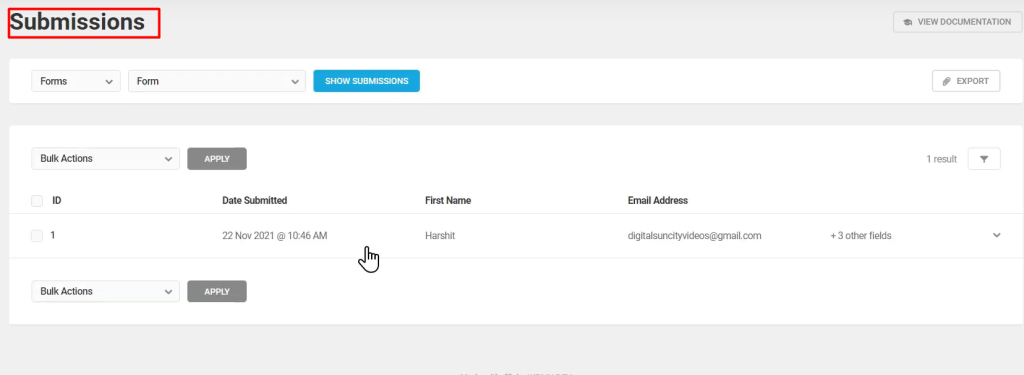
Step 6: View Form Submission Entries:
- To view the form submission entries, hover over “Forminator” and click on “Submissions.”
- Select the form for which you want to see the submission entries.
- Click on “Show Submission” to view the details of each entry.
Conclusion:
Congratulations! You have successfully created a contact form without the need for HTML or CSS coding using the Forminator plugin in WordPress. By following the steps outlined in this tutorial, you can easily customize and insert the contact form into your website, allowing visitors to submit their information effortlessly. Additionally, you can view the form submission entries within the Forminator plugin, making it convenient to manage and respond to user submissions. Enjoy the simplicity and efficiency of creating contact forms in WordPress with Forminator!

0 Comments