In this tutorial, you will learn how to use the HTML field in WPForms in WordPress. The HTML field allows you to showcase various elements such as images, videos, or tables within your form.
Here’s a step-by-step guide to using the HTML field in WForms in WordPress.
Step 1: Access WP Forms
Hover over WP Forms and click on “All Forms” to view your existing forms. You can also create a new form by clicking on the appropriate option.

Step 2: Add the HTML Field
To add an HTML field to your form, locate the form you want to edit and click on the “Edit” link. In the form editor, find the HTML field under the “Fancy Fields” section. Drag and drop the HTML field to the desired location within your form.

Step 3: Configure the HTML Field
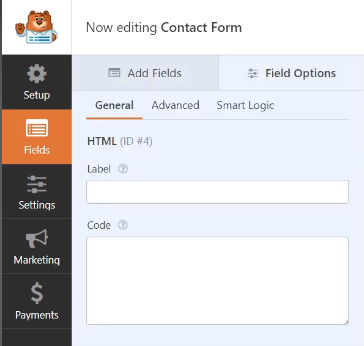
Click on the HTML field to access its settings. Enter a label name for the field (note that this label will only be visible in the form builder and won’t appear in the front end or form entries).
In the “Code” area, you can enter the HTML code for various elements you want to include, such as links, images, videos, or tables. Customize the HTML code according to your specific requirements.

Step 4: Save the Changes
Once you have entered the desired HTML code, click on “Save” to save the changes you made to the form.

Step 5: Preview the Form
To see the HTML field in action, preview the form. You will be able to view and interact with the HTML elements you added, such as the video or any other customizations you implemented using HTML.
By following these steps, you can effectively use the HTML field in WP Forms to add more creativity and professionalism to your forms. Whether it’s showcasing images, videos, or other HTML elements, the HTML field provides flexibility in creating customized and engaging forms.
Thank you for watching this video tutorial. If you have any questions or need further assistance, feel free to reach out.


0 Comments