WP Forms is a powerful WordPress plugin that allows you to create and manage forms on your website. In this tutorial, we will guide you through the process of saving form entries from WP Forms directly to Google Sheets. By connecting WP Forms with Google Sheets, you can easily organize and store form data for further analysis and processing.
You can also watch the video tutorial:
Requirements:
Before proceeding with the tutorial, please ensure that you have WP Forms Pro or a higher plan, as this functionality requires the advanced features provided by WP Forms Pro. You can find the affiliate link in the video description to upgrade if needed.
Step 1: Create a Form
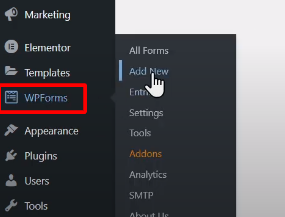
- Go to WP Forms in the WordPress admin dashboard and click on “Add New” to create a new form.
- Select a template that suits your requirements or start with a blank form.
- Customize the form fields according to the information you want to collect from users.
- Save the form once you have added all the necessary fields.
Step 2: Set Up Uncanny Automator and Google Sheets Integration
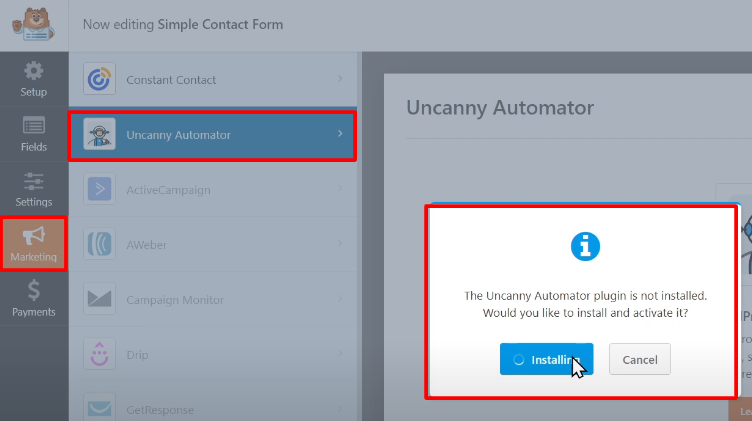
- WP Forms Pro offers direct integration with Uncanny Automator, a plugin that connects WordPress with various third-party apps. Find the Uncanny Automator tool under “Marketing” in WP Forms.
- Click on “Install Now” to install the Uncanny Automator plugin. After installation, save your changes and refresh the page.
Step 3: Create and Set Up Google Sheets
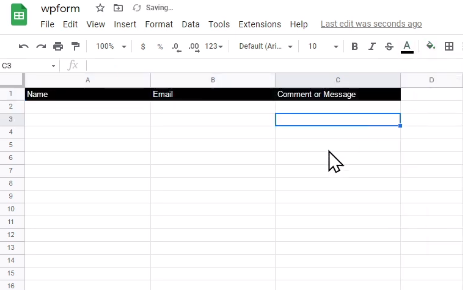
- Edit the name of the Google Spreadsheet to match your requirements.
- Set up the spreadsheet by adding columns that correspond to the fields in your WordPress form.
- Customize the styling of the spreadsheet as desired.
Step 4: Connect Uncanny Automator to Your Google Account
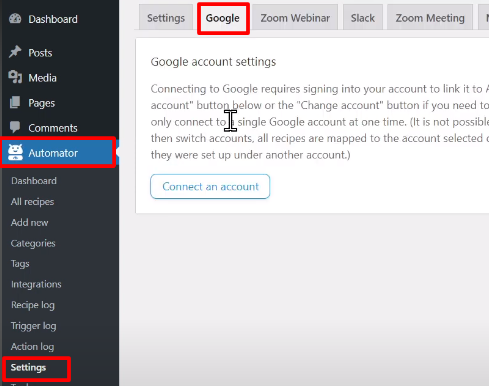
- Hover over “Automator” and click on “Settings.”
- Click on the “Google” tab and then select “Create an Account.”
- Choose your Google account and follow the prompts to connect Uncanny Automator with your Google account.
- You will see a success message confirming the successful connection.
Step 5: Connect WP Forms to Google Sheets
- Click on “Add New” under Automator to create a recipe.
- Select the type of recipe from the options provided. In most cases, choose “Everyone” to capture all form submissions.
- Give your recipe a title and select “WP Forms” as the trigger.
- Choose the option “The form is submitted” to capture all form submissions.
- Select the specific form on your website that you want to connect with Google Sheets.
- Save your recipe.
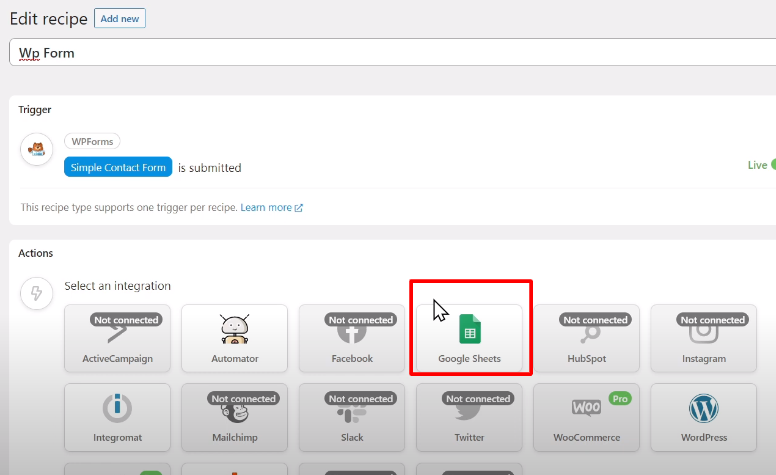
Step 6: Add Google Sheets as an Action
- Click on “Uncanny Automator” under Actions.
- Select “Google Sheets” from the list of available integrations.
- Choose “Create a Row in Google Sheet” as the action.
- Connect your Google Drive and select the spreadsheet and worksheet you created earlier.
- Click the “Get Columns” button to fetch the columns from the sheet.
- Insert the corresponding WP Forms fields into the appropriate columns.
- Save your action.
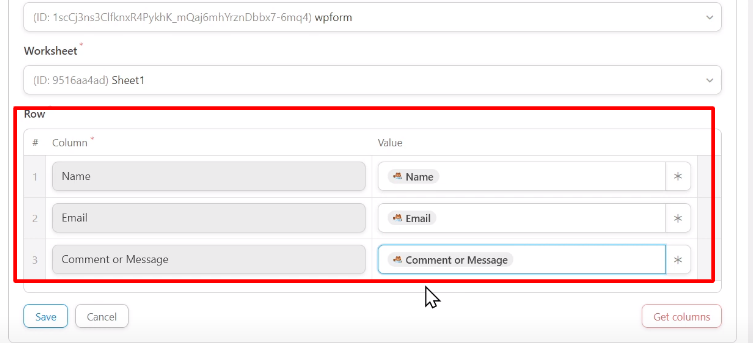
Step 7: Publish the Automation
- Switch the button to publish the automation.
- This will enable the integration between WP Forms and Google Sheets.
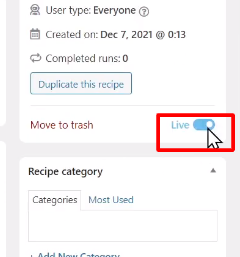
Step 8: Test the Process
- Preview the form and make a test entry.
- Submit the form and check the Google Sheet.
- Verify that the form entry is successfully saved in the Google Sheets.
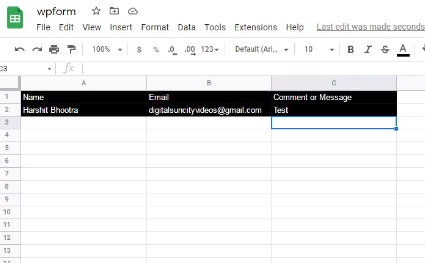
Conclusion:
By following these steps, you can easily save entries from WP Forms to Google Sheets in WordPress. This integration allows you to capture and store form submissions in an organized manner for future reference and analysis. Use the power of WP Forms


0 Comments