In this video tutorial, we will guide you through the process of installing and using the Survey and Poll add-ons in WPForms. These add-ons provide powerful functionality for creating surveys and polls, as well as generating reports and viewing statistics based on user responses. By following these step-by-step instructions, you’ll be able to gather valuable insights from your audience and make data-driven decisions. Let’s get started!
You can also watch the video tutorial:
Having said that, let’s move on to the steps on How To Install and Use Survey and Poll Addons In WP Forms.
Step 1: Install the Add-On
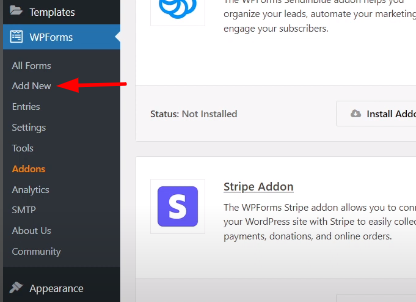
- Hover over WPForms in your WordPress admin dashboard and click on “Add-ons” in the menu.
- Search for the “Survey and Poll” add-on from the available add-ons.
- Click on “Install Add-on” to install it. The add-on will be activated automatically upon installation.

Step 2: Create a Form
- To enable survey functionality, create a new form or select an existing one.
- Click on “Add New” under WPForms to create a new form or choose an existing form to add survey features to it.

Step 3: Select a Survey Template
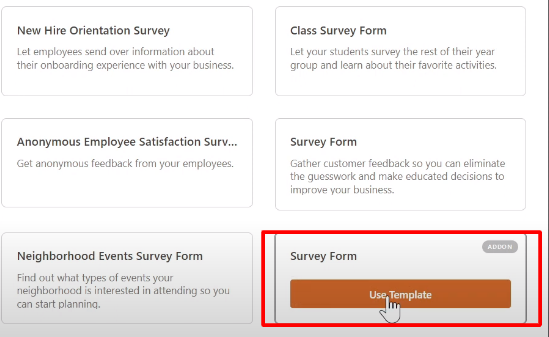
- When creating a new form, you will be presented with a template library.
- Search for a pre-made survey form template and select the one that suits your needs.
- This template will provide a structure for your survey, which you can further customize.

Step 4: Customize the Form Fields
- Once you have selected a template, add or customize the existing form fields according to your requirements.
- Modify the questions, options, and any other elements of the form to align with your survey or poll.

Step 5: Enable Survey Reporting
- To generate survey results and statistics, enable the survey reporting feature.
- Click on the “Settings” tab for your form and then click on “Survey and Polls.”
- Enable both checkboxes for survey reporting and poll results.

Step 6: Save the Configuration
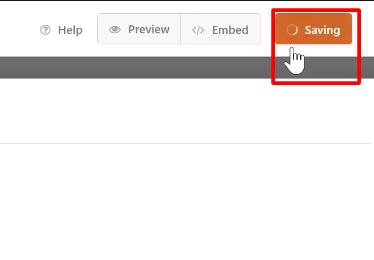
- After enabling the survey and poll features, click on the save button to save your form settings.

Step 7: Preview the Form
- To check the changes and see how the survey results and statistics are displayed, preview the form.
- Fill in the form as a test entry and submit it.

Step 8: View Survey Results
- After the form is submitted, you can view the survey and poll results.
- Click on “Entries” under WPForms and select the form from the list.
- This will show you the generated results and statistics.

Step 9: Generate Reports
- For any graphs in the results, you can choose the type of chart to include in your printed report.
- You can also click on “View Survey Results” to see all the statistics related to the survey and poll responses.

Conclusion: Congratulations! You have successfully installed and utilized the Survey and Poll add-ons in WPForms. By following these steps, you can create engaging surveys and polls, gather valuable insights from your audience, and make data-driven decisions. The survey reporting feature allows you to generate reports and view statistics based on user responses, giving you a comprehensive understanding of the collected data.


0 Comments