In this tutorial, you will learn how to add image choices in WPForms. Follow these steps to add image choices to your forms:
Step 1: Access WP Forms
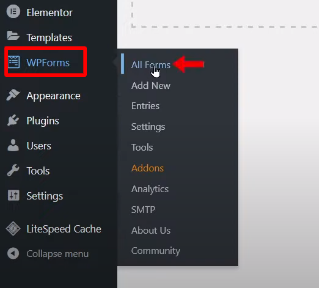
Hover over WP Forms and click on “All Forms” to access the form management page.
Step 2: Create a New Form
To add image choices to a new form, click on “Add New” to create a new form. Enter a unique name for the form and select a template that suits your needs.

Step 3: Add the Multiple Choice Field
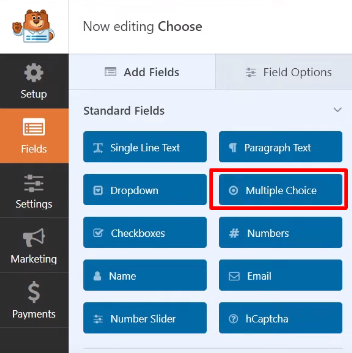
Drag and drop the “Multiple Choice” field from the form builder area to the desired position in your form.
Step 4: Configure the Field Options
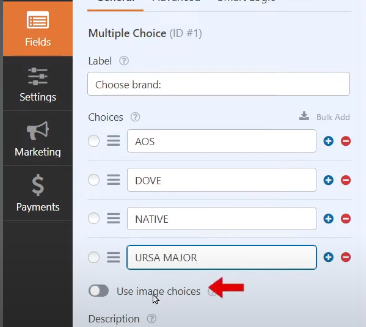
Click on the multiple choice field to access its options. Here, you can edit the label for the field and customize the choice names.

Step 5: Enable Image Choices
To add image choices, enable the “Use Image Choice” option. This option allows you to upload images for each choice.
Step 6: Upload Images
Upload the images for each choice by clicking on the upload button next to each choice. Select the desired image file from your computer and repeat this process for all the choices.

Step 7: Save the Form
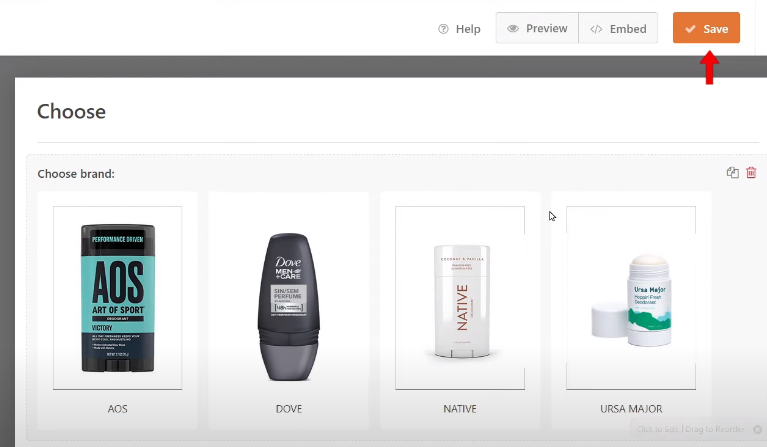
Once you have added the image choices and made any other necessary changes, click on the “Save” button to save the form.
Step 8: Preview the Form
To see the image choices in action, click on the “Preview” button to preview the form. You will now be able to see the image choices displayed in the form.
By adding image choices to your forms, you can provide visual options for your users to select from, enhancing the user experience and making your forms more engaging.
That’s it! You have now learned how to add image choices in WP Forms. Feel free to experiment with different images and form designs to create visually appealing and interactive forms.


0 Comments